Sunday, October 31, 2010

Autumn Salad


In the midst of a season filled with so many warm casseroles and pumpkin desserts, last night I was craving a big salad for dinner. Keeping with the season though, I opted for a Fall-themed salad.

Bring on the butternut, my friends. I made Ina Garten's "Roasted Butternut Squash Salad with Cider Vinaigrette."

Last week, I was fortunate enough to score her Back to Basics cookbook from a giveaway on Mads' blog. Since Ina Garten is pretty much my baking idol (Outrageous Brownies, anyone?), I was absolutely thrilled to find such an awesome surprise on my front porch.

I loved everything about this salad: apple cider dressing, toasted walnuts, and roasted butternut squash (my favorite!). For those of you who shy away from serving a salad as a main course to your family--be shy no more! We paired this dinner-plate salad with biscuits and jam for a filling, healthy Saturday night meal. (Don't be deceived though: we went out for ice cream at Coldstone Creamery afterwards).

As a side note, I completely recommend the Back to Basics cookbook to anyone who likes to cook. The delicious recipes are endless, the ingredient lists are short, and there are pictures to accompany every dish. We're making two more recipes from the book tonight :)

Are you an Ina Garten fan? Do you have a favorite recipe?

Roasted Butternut Squash Salad with Cider Vinaigrette
(a recipe adapted from Ina Garten's Back to Basics Cookbook)

I absolutely love this salad. I don't know what else to say. It's just that good.

Ingredients:
  • 1 large butternut squash, peeled and cubed
  • a little olive oil
  • a drizzle of maple syrup
  • salt and pepper to taste
  • Dried cranberries
  • 3/4 cup apple cider
  • 2 TBSP cider vinegar
  • 3 cloves garlic, minced
  • 2 tsp. Dijon mustard
  • Spinach, chopped and stemmed
  • Toasted walnuts, chopped
  • Grated Parmesan cheese
Directions:

1) Preheat oven to 400 degrees. Spray a baking sheet with cooking spray.

2) Place butternut squash cubes in a large bowl. Drizzle with just a little olive oil (1 TBSP?) and a little maple syrup (1 TBSP?). Sprinkle with salt and pepper to taste. Place squash in a single layer on baking sheet and bake for approximately 20 minutes, or until tender (Stir halfway through cooking time).

3) While the squash is roasting, make the dressing. Combine the apple cider, vinegar and garlic in a small saucepan over medium-high heat. Bring to a boil. Cook for 6 -8 minutes until cider is reduced to about 1/4 cup. Remove from heat and whisk in mustard, 1/2 tsp. salt and 1/2 tsp. black pepper. Drizzle a little olive oil in as well (about 1 - 2 TBSP).

4) Individually plate salads, layering spinach, squash, dried cranberries, walnuts, and cheese. Drizzle dressing over individual servings.


Saturday, October 30, 2010

Apple Coffee Cake


"Tastes like really good blueberry buckle...but with apples instead of blueberries."

This quote-worthy moment from Adam neatly sums up today's breakfast.

Although our usual Saturday morning routine involves pancakes (take your pick: banana-blueberry, carrot cake, or apple), I woke up this morning with visions of cinnamon rolls running through my head. Unfortunately, I didn't have the forethought to make the dough last night, nor did I have the patience to wait 2 - 3 hours for the dough to sufficiently rise.

No worries. A solution was found in an apple-licious coffee cake. Or, Apple Buckle as Adam refers to it. Faster to prepare, yet equally satisfying.

I re-worked a coffee cake recipe from Emeril Lagasse, which resulted in a moist, soft coffee cake super-packed with apples. For a girl who doesn't drink coffee, I can sure throw back a piece of coffee cake with the best of 'em :)

Happy Saturday to you!

Apple Coffee Cake
(a recipe inspired by an Emeril Lagasse creation)

This is the perfect fall breakfast treat. It's loaded with apples, slices neatly, and pairs perfectly with your favorite early-morning beverage.

Cake Ingredients:
  • 1/4 cup butter, softened
  • 3/4 cup brown sugar
  • 1 egg
  • 1 cup of all-purpose, unbleached flour
  • 1/2 tsp. baking soda.
  • 1/4 tsp. salt
  • 3/4 tsp. cinnamon
  • 1/4 cup reduced-fat sour cream
  • 1/4 cup fat free vanilla yogurt
  • 1 tsp. vanilla extract
  • 2 cups chopped apples
Topping ingredients:
  • 1/4 cup brown sugar
  • 1/4 cup flour
  • 1/2 tsp. cinnamon
  • 2 TBSP butter
Glaze ingredients:
  • 1/4 cup brown sugar
  • 1 TBSP water
  • 1/2 tsp. vanilla extract
Directions:
1) Preheat oven to 350 degrees. Spray an 8 x 8 pan with cooking spray

2) In a large bowl, cream the butter and brown sugar together until fluffy with an electric mixer. Beat in the egg.

3) In a separate bowl, combine the dry ingredients. Alternately add the dry ingredients and the yogurt and sour cream to the butter mixture. Beat in vanilla. Stir in the chopped apples. Pour batter into prepared pan.

4) In a small bowl, combine the topping ingredients, using a fork to "crumble" the butter. Sprinkle the topping over the batter. Bake for 35 - 40 minutes, or until a toothpick inserted in the center comes out clean (I started checking at 30 minutes. Mine was finished at about 37 minutes).

5) Combine the glaze ingredients in a small bowl. Drizzle over coffee cake about 5 minutes after you remove the cake from the oven.

6) Happy Saturday!

Thursday, October 28, 2010

Lasagna Lovin' Fool


I absolutely love lasagna.

While the traditional meatless-marinara version is delightful in its own way, tonight I'll introduce you to a company-worthy lasagna that will blow your mind.

That's right: Mind-blowing. Well, let's be honest-- I owed it to you after two nights in a row of celery.


With feta cheese, fresh rosemary, and artichoke hearts, this recipe takes the traditional comfort-food pasta bake, and cranks it up a notch. Or ten notches.

My older sister first made this recipe a few years ago when I was in graduate school. Being the thoughtful sister she is (or, simply pitying my stressed-out, impoverished student lifestyle at the time), she would cook dinner for me on Wednesday evenings. Since the Wednesday night she created this garlicky work of art, I've never found a lasagna recipe that comes close to being this tasty.

This recipe is ideal for a special occasion--birthday, anniversary, good hair day, etc. Tonight's cause for celebration? My friend Alli, who is well on her way to becoming a Physical Therapist Extraordinaire, just completed two big exams and is need of some R & L (rest and lasagna).

I was more than happy to help :)

Suggestion: I actually prepared the lasagna last night (you know, around 9pm when every sane person starts a lasagna), covered and refrigerated it, and then popped it in the oven when I got home from work today. Paired with garlic bread and a side salad, it's easy-peasy gourmet tonight.

What's your favorite way to enjoy pasta?

Spinach Artichoke Lasagna
(recipe from my cooking-genius sister Kendra, who credits AllRecipes.com)

Finally! A flavor-packed vegetarian lasagna that isn't loaded with cream and alfredo sauce. It's definitely a crowd-pleaser for vege-heads and carnivores alike.

Ingredients:
  • 9 uncooked whole wheat lasagna noodles
  • 1 large onion, diced
  • 4 large cloves of garlic, minced
  • 1 can (14 oz.) of veggie or chicken broth
  • 1 TBSP fresh rosemary (or 1 tsp. dry)
  • 1 jar (14 oz.) of artichoke hearts in water, drained and chopped
  • 1 (10 0z.) package of frozen spinach, thawed, drained, and squeezed dry
  • 1 28 oz. jar marinara sauce (I used a sauteed onion and garlic variety)
  • 3 cups shredded mozzarella or Italian cheese blend (I didn't measure, I just sprinkled a little on each layer)
  • 1 (4 oz.) package of garlic and herb feta cheese
Directions:

1) Cook lasagna noodles according to package directions. Coat a 13 x 9 pan with cooking spray.

2) Meanwhile, heat a little olive oil over medium-high heat in a sauce pan. Add onion and garlic and cook for 3 minutes, until onion is just tender. Stir in broth and rosemary and bring to a boil. Add spinach and artichoke hearts; reduce heat, cover, and simmer for about 5 minutes. Stir in marinara sauce.

3) Spread 1/4 of artichoke mixture in the bottom of the prepared pan. Top with 3 cooked noodles. Sprinkle with 3/4 cup cheese (I just sprinkled a thin layer on). Repeat layers 2 more times, ending with artichoke mixture and cheese. Sprinkle crumbled feta on top.

4) Cover lasagna and bake at 350 degrees for 40 minutes. Uncover and bake 15 more minutes until bubbly. Allow to sit for 10 minutes before cutting and serving.

5) Invite Garfield the Cat over for dinner. He's never had lasagna this good.

Wednesday, October 27, 2010

Simple Side Dish: Take 2

I know what you're thinking:

"Another simple side dish? Another post that centers around celery?

Come on, lady. We're looking for a culinary creativity. Vegetarian masterpiece. Not Cooking 101 with the world's most stringy vegetable."

Trust me. I hear ya.

But sometimes, the days get so busy that you only find time for a simple veggie dish to round out your day.

Tomorrow I'll bring you Artichoke Lasagna. So give me a pass on today, and let's talk celery and walnuts.

I made this salad last night, knowing that today wouldn't provide time for dinner-cooking. I ate so much out of the serving bowl last night, you probably could have counted it as my fourth meal. Bonus: It takes 10 minutes to prepare.

Celery isn't often prized as the centerpiece of a delicious dish. More often it plays the role of supporting actor. However, in this awesome dish, celery is paired with a full cup of toasted walnuts, a little salt n' pepper, and some grated Parmesan for a powerful flavor punch (the non-violent kind).

Wow. Fourth meal.

Pair this guy with any number of main course dishes. Or, play me for the evening and eat a massive bowl for dinner while you pre-cook lasagna noodles. I think I ate my weight in toasted walnuts.

Totally worth it. Fourth meal rocks.

Celery, Walnut & Parmesan Salad
(recipe courtesy of Cooking Light)

This side dish is so flavorful and filling--toasted walnuts give it the protein needed to bump it up to a filling "supporting actor" role. Don't forget to TOAST the walnuts. Absolutely necessary.

Ingredients:
  • 5 ribs of celery, thinly sliced (about 3 - 4 cups)
  • 1 cup of chopped walnuts, toasted
  • 1 TBSP olive oil
  • 1/2 tsp. salt
  • Ground pepper to taste (we used A LOT!)
  • Garnish with grated Parmesan cheese
Directions:
Super Simple: Combine all ingredients in a large bowl. Stir, eat, enjoy. Repeat.

Tuesday, October 26, 2010

Simple Side Dish

Do you remember those first recipes you dabbled in when you were learning how to cook?

Good times, right?

My early-learning adventures in cooking began as a graduate student. At the time, I had never heard of cumin, I thought fat-free cheese was a perfectly acceptable substitute for the real deal, and I was unaware of the differences between margarine and real butter.

My first recipes included vegetarian chili, marinara sauce with spaghetti, and bean burritos. Once I learned to make these bad boys, they quickly became the three-meal rotation I cooked every week. Yep, every week. I've always been a creature of habit.

Also topping the list of "first foods" in my cooking journey was Carrot and Celery Amandine. Adam discovered it on Allrecipes.com (shortly after our discovery of the bean burrito recipe), and it quickly entered into the rotation. Soy sauce gives it a flavorful taste, and toasted almonds provide the crunch I need when I'm eating cooked vegetables.

Tonight, we returned to our early days of cooking and made Carrot and Celery Amandine to go with our leftover Tofu Sandwiches. Brings back memories :)

What were your first recipes when you began cooking?

Carrots and Celery Amandine
(courtesy of Allrecipes.com)

This simple side dish is the perfect accompaniment to a sandwich dinner.

Ingredients:
  • 3 cloves of garlic, minced
  • a dash of olive oil
  • 2 TBSP water
  • 2 TBSP low-sodium soy sauce
  • 1/2 tsp. sugar
  • 1 - 1/4 cups chopped carrots
  • 1/2 cup chopped onion
  • 1/2 cup chopped celery
  • 1/4 cup chopped, toasted almonds
Directions:
Heat a little olive oil in a large saucepan over medium heat. Add onion and saute until softened, about 3 minutes. Add garlic and saute for one additional minute. Add the carrots, celery, water, soy sauce, and sugar. Stir to combine, cover, and reduce heat to medium-low. Cook until vegetables are tender-crisp, about 5 minutes. Stir in chopped almonds.

Monday, October 25, 2010

Tofu-riffic Dinner

Tofu: You either love it, or you hate it.

Or maybe you've never even tried it.

"Tofu, Kylie? Really? You expect me to eat a spongy white block of protein? Thanks, but no thanks. You keep your hippy-granola-bird food, and I'll keep my stick-to-your-ribs goodness."

Oh, no you don't. You're not going to get away with that kind of talk around here, friends.

I'll admit: Tofu was never my favorite amongst health foods. I always enjoy it in restaurants (thinly sliced, marinated, and baked or fried [!] until crispy). And of course I've always loved it in desserts (Whipped with melted dark chocolate? Tofu pudding here I come.).

Unfortunately, I always flopped when I tried to re-create the tofu-rrific dinners I gobbled up in restaurants. My fatal flaw? Not pressing the liquid out first. How foolish of me.

For tonight's dinner, Adam re-created the tofu sandwich he ordered at the Quiet Storm on Saturday. For the first time in the Hungry Spoon kitchen, we pressed our tofu. The result? Thinly sliced, perfectly marinated, sesame-seasoned tofu. While it still doesn't match up to the fried stuff (and in what alternate universe would it?), it provides a scrumptious, nicely textured, protein-rich addition to to a mile-high sandwich.

The non-optional condiment for this sandwich? Homemade guacamole with lots of garlic. That's right: mashed avocado, minced garlic, and a dash of lime juice. So simple. So necessary.

Friends, give tofu a try. As the queen of massive, messy, fork n' knife vegetarian sandwiches, I promise you won't go wrong with this one.

But then again, you can't go wrong with tofu n' chocolate either :)

Do you like tofu? What's your favorite way to eat it?

Sesame-Soy Tofu-rrific Sandwich
(Adam's recipe)

Marinating the tofu in a sesame-soy marinade transformed it into a flavorful protein-packed sandwich filler. Top with all your favorite sandwich fixins'. Just don't forget the guac!

Ingredients:
Tofu and Marinade:
  • One 12 oz. package of tofu, extra firm
  • 1/3 cup soy sauce
  • 2 tsp. sesame oil
  • Garlic powder to taste
  • sesame seeds
Guacamole:
  • 1 avocado
  • 2 cloves of garlic, minced
  • 2 TBSP diced onion
  • 2 TBSP diced tomato
  • splash of lime juice
  • sprinkling of cumin
Sandwich Stackers:
  • 1 green bell pepper, sliced
  • 1 large onion, sliced
  • 4 cloves garlic, minced
  • a little olive oil
  • Sliced tomato
  • Bread or buns
  • Optional: Swiss cheese
Directions:

1) To prepare the tofu, slice thinly (about 1/4 inch thick). Place tofu on a clean kitchen towel and gently press to eliminate extra liquid. Repeat again with another clean towel (until tofu is dry to the touch). Combine marinade ingredients in a baking dish. Place tofu in a single layer in the baking dish. Cover and refrigerate at least one hour (we left it all day while we were at work).

2) When you're ready to cook, preheat oven to 375 degrees (or higher? We did 375 degrees today, but next time we may go up 25 degrees), and lightly spray a baking sheet with cooking spray. Place tofu in a single layer on the baking sheet (discard marinade/extra liquid). Bake for 10 minutes. Flip the tofu onto the opposite side, sprinkle with sesame seeds, and continue baking for 10 additional minutes.

3) To prepare guacamole, peel avocado and mash in a bowl, add remaining ingredients and stir until combined.

4) To prepare pepper and onions, heat a little olive oil in a skillet over medium heat. Add bell pepper, onion, and garlic, and saute until softened and lightly browned ( about 5 -8 minutes).

5) Slice bread. Top each piece with one slice of Swiss cheese (if using) and toast bread in a toaster oven.

6) To assemble sandwiches: Layer your bread with guacamole, sliced tomato, tofu slices, and sauteed pepper and onions.

Sunday, October 24, 2010

Cranberry White Chocolate Cookies


This weekend has been filled with plenty of delicious Foodie adventures...although very few have actually taken place in my kitchen.

The Hungry Spoon kitchen was abandoned yesterday in favor of a day trip to Pittsburgh. That's right friends: we headed north for a day in "the big city."

We enjoyed a trip to the Market, explored the Strip District, spent a good deal of time at a used book store, and settled for the afternoon at the Beehive Coffeehouse. Inevitably, the day concluded at my favorite spot for vegetarian cuisine--The Quiet Storm (I ordered the ultimate and highly addictive Apple Panini. I urge you to re-create this in your own kitchen. You won't regret it).

Enough about my travels, though. Let's get to the good stuff: White Chocolate-Cranberry Oatmeal Cookies. I initially feasted my eyes on these sweet treats at the Simply Life blog, and reading the recipe title alone convinced me that I had to try them.

Magnificent! I baked a batch late last night after we returned from PA, and I have no doubt they'll be gone quite soon. This cookie is chewy and rich, and the tart cranberries balance out the sweetness of the white chocolate quite nicely.

Happy Baking to you!

Do you ever do late-night baking?

Cranberry & White Chocolate Oatmeal Cookies
(recipe courtesy of Simply Life blog; makes about 2 dozen cookies)

This cookie exemplified the perfect oatmeal cookie for me--chewy and sweet. Cranberries and white chocolate make a great addition.

Ingredients:
  • 2/3 cup butter
  • 2/3 brown sugar
  • 2 eggs
  • 1 tsp. vanilla extract
  • 1- 1/2 cups quick oats
  • 1 - 1/2 cups unbleached all-purpose flour
  • 1 tsp. baking soda
  • 1/2 tsp. salt
  • 6 oz. dried cranberries
  • 2/3 cup white chocolate chips
Directions:

1) Preheat 375 degrees. Prepare baking sheets with cooking spray.

2) In a large bowl, beat together the butter and sugar with an electric mixer. Add eggs and vanilla and beat until well-combined.

3) Combine the dry ingredients (through the salt) in a separate bowl. Add to butter mixture. Stir in cranberries and white chocolate chips with a spoon.

4) Place rounded spoon-fuls of dough on cookie sheet and bake 8 - 10 minutes, or until lightly browned at the edges (mine were done in 8 minutes exactly).

4) Enjoy! These are definitely good cookies to eat with a glass of milk :)


Thursday, October 21, 2010

Hummus Surprise


Isn't hummus the best?

Smooth texture, heavy on the garlic, rich tahini flavor...when it comes to spreadable foods, it's hard to beat hummus (well, let's be honest: hummus is a close second to nut butter, right?).

Although we're all used to consuming hummus with the usual suspects--raw veggies, wrap sandwiches, falafel, and pita bread--tonight I enjoyed it with a most un-usual suspect: pasta.

Thank you, Clean Eating Magazine. They never fail to inspire the most innovative and fresh ideas when it comes to food. We paired sun-dried tomato pasta with roasted garlic hummus, roasted broccoli, and red bell pepper.

The result was absolutely delectable, and amazingly easy to assemble, rendering it the perfect menu to follow a long day of work. Bonus: This pasta dish definitely has a summer-time vibe to it, which is just what I need in the midst of this chilly weather and pumpkin insanity (don't get me wrong--I'm as much of pumpkin-head as the next girl right now. But isn't a taste of July in order every now and then?)

Save the falafel for another night. Tonight, go wild with your hummus and try it with pasta.

Do you have any unique or unusual pasta toppings?

Sun-Dried Tomato Pasta with Hummus and Roasted Broccoli
(adapted from Clean Eating Magazine)

Feel free to load up more veggies with this one--add whatever sounds good to you! Sorry there aren't any amounts on this one--we just added as we went along :)

Ingredients:
  • Sun-dried tomato pasta
  • Broccoli florets from one crown of broccoli
  • a little olive oil
  • Garlic powder
  • Salt and pepper to taste
  • Pre-made roasted garlic hummus (we went the lazy route and used pre-made batch from Aldi. Delicious!)
  • 1 red bell pepper, sliced
  • 1 carrot, shredded
Directions:

1) Cook pasta according to package directions. Preheat oven to 420 degrees.

2) Place broccoli in a large bowl. Drizzle with a little olive oil and sprinkle with garlic powder, salt, and pepper. Roast broccoli in the oven for 12 - 15 minutes, tossing once halfway through.

3) To serve, add hummus and veggies to individual servings of pasta.

Wednesday, October 20, 2010

A Match Made in (Nut) Heaven


The first gift Adam ever gave me was jar of peanut butter.

When we first started dating in college, I returned to my dorm room one afternoon to find a gift bag hung over the knob. Inside, I found a jar of peanut butter, a bag of chocolate chips, and a post-it note wishing me a good weekend.

A man who gives me nut butter to show that he cares? True love, I tell you.

Needless to say, someone with a nut allergy would not fare well in our house. My nut addiction extends far beyond the obvious peanut butter + chocolate obsession, and infiltrates most dishes we eat. Pasta dishes, salads, desserts, even bean burgers--they're all friends of the nut.

When it comes to desserts, I'd argue that quintessential nutty treat is the classic peanut butter cookie. Who doesn't love this sweet n' salty bite-sized treat, complete with its own signature--a stylish fork imprint?

While I love my classic PB cookies as much as the next girl (bring on the butter!), tonight we're going to explore the wonderful world of lower-fat, almost-vegan peanut butter cookies.

No worries--these cookies do not take on the cake-like texture that often characterizes lower-fat cookies (because let's be honest: there's nothing more disappointing than a dry, high-rise, cake-like cookie). They're chewy and ridiculously delicious, similar to their full-fat counterparts.

I discovered this recipe a couple years ago at the amazing Cookie Madness website. It makes an appearance in our house quite regularly, and happily satisfies my after-dinner-sweets-n-peanut-butter craving.

Eat up! And remember--if a guy ever gives you a jar of peanut butter as a gift, snatch him up and marry him. It'll be the best decision you ever made :)

(Almost) Vegan Peanut Butter Cookies
(Recipe adapted from Anna at Cookie Madness)

These cookies are a tad on the crumbly side, likely due to the lack of egg. I've never experimented with the recipe to see how this could be reduced (I love the taste and texture so much, the crumbly factor doesn't bother me a bit!). Either way, they completely satisfy the sweet n' salty peanut butter cookie crave :)

*The "almost" vegan tag is because I used yogurt. The original recipe calls for applesauce.

Ingredients:
  • 1 cup, plus 2 TBSP unbleached, all-purpose flour
  • 1 tsp. baking soda
  • 1/4 tsp. salt
  • 1/2 cup brown sugar
  • 3 TBSP vegetable oil
  • 3 TBSP fat free vanilla yogurt
  • 2 TBSP honey
  • 1 tsp. vanilla extract
  • 1/2 cup natural peanut butter
Directions:

1) Preheat oven to 325 degrees. Prepare baking sheets with cooking spray.

2) Combine brown sugar, vegetable oil, yogurt, honey, vanilla, and peanut butter in a bowl. Add dry ingredients to peanut butter mixture and stir until fully combined.

3) Drop dough by large spoon-fuls onto baking sheet (makes about 12 large cookies). Use a fork to make awesome peanut butter cookie signature on top, if desired (I forgot this time).

4) Bake for about 10 - 12 minutes, or until golden brown around the edges. No worries about under-baking--they're vegan!

Tuesday, October 19, 2010

Channeling the Creativity Gods...

When it comes to kitchen creativity, not all days are created equal.

Some days the Foodie wheels in your brain are cranking in over-drive, inspiring dishes like Garlic and Pine Nut Bean Dip or S'More Bar Cookies. These are the days you can wait for leftover lunches the next day, and you delight in e-mailing the recipe to everyone you know. Culinary success! Move over Ina Garten: There's a new girl in town.

Sometimes, however, dry toast represents the outer limits of your creativity for the day. Where is the inspiration?! Why aren't the cookbooks talking to me?! Somebody phone Julia Childs and send HELP!

Over-dramatic, I know. But the key point remains: In the creativity department, today was a dry toast kind of day.

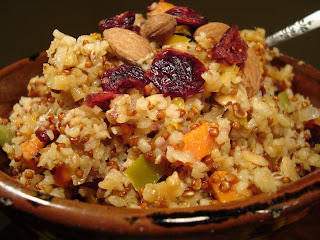
Today's recipe is a deliciously vegetarian pilaf, made from a combo of both bulgur and quinoa (we didn't have enough of each grain alone, so we just combined everything we had of each). Although the pilaf is truly scrumptious, I merely wanted to warn you that it reminds me of a combination of all the other grain salads and pilafs I've posted before. Delicious recipe, but lacking in the thrilling "Wow! This is new and completely different!" factor.

Regardless, it's healthy, crunchy, veggie-ful, and quite tasty. If you use veggie broth, it's also completely vegan. I enjoyed my pilaf simply as the recipe stated, no add-ins necessary.

So, may we raise our glasses to an evening of healthy, delicious food, and a mind utterly lacking in recipe originality. Looks like Ina Garten doesn't have anything to worry about after all :)

Quinoa n' Bulgur Pilaf with Nuts, Fruit, and Veggies
(Adapted from a recipe in Clean Eating Magazine)

The original recipe actually calls for a grain called "Farro." Although I was super excited to try it, I was disappointed to find that they don't sell it in our town! Perhaps on our next road trip to Pittsburgh we'll be able to pick some up. If you have Farro on hand though, by all means try it with this recipe!

Ingredients:
  • 4 cups of veggie broth or low-sodium chicken broth
  • 1 cup of red quinoa
  • 1 cup of bulgur
  • 3/4 cup of chopped, toasted almonds or pine nuts
  • 2 TBSP olive oil
  • 1 large onion, diced
  • 4 cloves of garlic, minced
  • 2 stalks of celery, diced
  • 1 carrot, diced
  • 1 yellow bell pepper, diced
  • 1 tsp. dried thyme
  • 1/2 cup dried cranberries
  • 1/2 cup dried apricots, diced
  • 1/2 tsp. salt
  • 1/2 tsp black pepper
Directions:

1) Bring broth to a boil in a saucepan. Add bulgur and quinoa, reduce heat to low and simmer for 10 - 15 minutes until grains are fully cooked. Pour grains into a strainer, reserving extra liquid in a bowl.

2) While grains are cooking, heat oil in a large skillet over medium heat. Add garlic, onion, carrot, bell pepper, and celery, and saute until veggies are soft, about 5 minutes. Add thyme, cranberries, apricots, salt, and pepper. Saute for 2 more minutes.

3) Add veggie mixture, nuts, and 2/3 cup of reserved broth to the grains. Stir to combine. Allow to sit, covered for about 10 minutes to ensure that all liquid is absorbed.

Monday, October 18, 2010

Thinking Outside the Butternut Box


I lucked into another butternut squash (three cheers for neighbors with successful gardens!), and subsequently was left with a major decision: What B-Nut recipe do I try next?

Overwhelmed with options ranging from savory soups to sweet pies, I finally settled on the next squash-a-licious recipe to grace the Hungry Spoon kitchen: Southwestern Stuffed Squash, courtesy of Erin at The Healthy Apron.

Although Erin's recipe calls for Acorn Squash, I've made some adaptations (through trial and definitely error!) to make it work with the good ol 'butternut.

I love this recipe, first and foremost, because it's original and unique...at least in the squash department. I typically associate squash recipes with seasonings like sage, thyme, and savory, or sweet potato seasonings like cinnamon, brown sugar, and nutmeg. As a result, my squash recipes often remind me of Thanksgiving. This isn't necessarily a bad thing (case in point: amazing risotto), but sometimes I want my squash sans Turkey-Day recollections. This recipe fits the bill-- a Southwestern flare with beans, cumin, a hint of chili powder. Love it!

Bonus: Not only does this recipe get you out of the traditional butternut box, but the ingredient list is short, and you most likely already have the them stocked in your kitchen. Shorter grocery list? I'm in!

Whatever your butternut craving is, be sure to indulge while you can...'tis the season for squash-a-licious treats. If you're feeling adventurous, push the sage and thyme to the back of the spice rack today--let's think outside the butternut box.

Southwestern Stuffed Butternut Squash
*Erin's recipe actually calls for acorn squash, which is much easier and appropriate for stuffing. However, it worked fine with butternut with some modifications :)

Take advantage of squash season! This recipe offers a great recipe using pantry and fridge staples, and it serves two perfectly. Complete the meal with a side salad and homemade cornbread.
Ingredients:
  • 2 butternut squash
  • a little butter (or Smart Balance)
  • water
  • 1 small onion, sliced
  • 1 tsp. cumin
  • 1 tsp. chili powder
  • Salt and pepper to taste
  • 1 can (15 oz.) black beans, rinsed and drained
  • 1/2 cup refried beans
  • 1/2 cup salsa
  • 1/2 cup shredded sharp Cheddar cheese
  • Guacamole/avocado and diced tomatoes for topping
Directions:

1) Preheat oven to 3500 degrees. Cut squash in half, lengthwise, and scoop out the seeds. Lightly brush the tops of each squash half with butter or Smart Balance. Prepare your baking dish by pouring just a little water in the bottom of the dish--about 1/2 cup of water. Place the squash in the dish, butter side up, and cover with aluminum foil. Bake for 40 - 60 minutes (the time varies vastly depending on your squash. Check at 40 - 45 minutes to see if the squash is tender. You should be able to pierce it with a fork). When squash is just tender, remove from oven and set aside.

2) Meanwhile, heat a drizzle of olive oil in a skillet over medium heat. Add onion and cook until softened and lightly browned, about 5 - 7 minutes. During the last minute of cooking add cumin, chili powder, salt, and pepper to onion.

3) Combine onion with remaining ingredients to complete the stuffing mixture.

4) Now it's time to stuff your squash! You can simply stuff the small squash cavity with the stuffing, and serve the leftover filling on the side. Or, you can scoop out some of the squash to provide more cavity/space to put your stuffing (we scooped out some of the squash for more stuffing space--we also stirred some of the scooped-out squash into the stuffing mixture).

5) Once your squash is stuffed, sprinkle the top with additional cheese, if desired. Return squash to the oven and bake for an additional 10 minutes, or until heated through. Serve squash with guacamole/avocado, chopped tomatoes, and any extra stuffing mix on the side.

Saturday, October 16, 2010

Chunky Monkey Bread


Let's face it: I'm bananas about chocolate + peanut butter.

Bananas?

Why didn't I think of this before? Chocolate + peanut butter + bananas.

My first experience with this terrific trio was Ben & Jerry's Chunky Monkey ice cream (Banana ice cream with fudge and walnuts). Although I haven't had it for years, I have fond memories of eating it out of the carton at high school slumber parties (it often made an appearance after 11:00pm....when the first movie screening of "Happy Gilmore" or "American Pie" was over for the evening).

Convert Ben & Jerry's brilliant flavor creations into loaf form, and you've got Chunky Monkey Bread.

I was inspired to make this bread after Cooking Light did a feature spread on banana bread last month. They boasted a Peanut Butter Banana Bread, as well as a Chocolate Banana Bread, but why not combine the two?

One tidbit of advice I recommend for this recipe is coarsely chopping the chocolate chips--it distributes more chocolate throughout the batter, and in what universe is that not a good thing?

My best serving suggestion is to top your slice of Chunky Monkey bread with some natural peanut butter and sliced bananas. I apologize for forgetting to snap a picture of my loaded-up slice before I ate it (the rest of this loaf is being shipped off to Wisconsin and Virginia for my two pregnant friends. When you're eating for two, you definitely can't get enough chocolate + peanut butter + banana in your life).

Enough talk though. Let's get our Chunky Monkey on.

Chunky Monkey Bread
(a recipe adapted from Cooking Light)

Just when you thought it didn't get any better than chocolate + peanut butter...we went and added bananas to the mix. I recommend topping your slice of bread with natural peanut butter and banana slices. But Nutella would work, too :)

Ingredients:
  • 1 1/2 cups mashed, ripe banana
  • 1/3 cup fat free vanilla yogurt
  • 1/3 cup all-natural chunky peanut butter
  • 3 TBSP canola oil
  • 1 tsp. vanilla extract
  • 2 eggs
  • 1/2 cup sugar
  • 1/2 cup brown sugar
  • 1 1/2 cups unbleached all-purpose flour
  • 1/4 cup ground flaxseed
  • 3/4 tsp. baking soda
  • 1/2 tsp. salt
  • 1/2 tsp. cinnamon
  • 1/3 cup chopped, toasted pecans
  • 1/2 to 3/4 cup chocolate chips, coarsely chopped
  • Optional: natural peanut butter and sliced bananas to serve (Nutella would be tasty, too)

Directions:
1) Preheat oven to 350 degrees and grease a 9 x 5 inch loaf pan with cooking spray.

2) Combine banana, yogurt, peanut butter, oil, vanilla, and eggs in a large bowl. Beat with a mixer at medium speed. Add white and brown sugar and beat until combined.

3) Combine flour, flaxseed, baking soda, salt, and cinnamon in a small bowl. Add flour mixture to banana mixture and beat until just combined. Stir in pecans and chopped chocolate with a spoon. Pour batter into prepared pan and bake for approximately 60 minutes, or until a toothpick inserted in the center comes out clean.

4) Allow bread to cool. To serve, smooth some peanut butter on your slice and top with sliced banana.

The Biscuit Trials


Southern-style biscuits come with my family history.

Unfortunately, I'm starting to fear that I might be the generational "fail:" the one who never masters the biscuit department, and single-handedly causes the collapse of a family tradition passed down for over a hundred years.

No pressure though, right?

My mom learned the family biscuit-making methods from my great-grandmother (who learned the method from generations before her). As the girl who loves all-things-cooking, it seemed natural that I would take up the biscuit-making talent as if it were second nature.

I couldn't have been more wrong.

Despite countless tutorials, and much dedicated effort, I'm completely incompetent at biscuit-making. In my own defense, the family recipe has no recorded amounts (it's not even written down)--my mom's verbal instructions are complete with "a pinch of this," "a little of that," "a scoop of shortening," and so on. I know the cardinal rule is not to overwork the dough--your biscuits will come out tough (hockey pucks, anyone?).

But the cardinal rule does no good if you don't have "the touch."

After recognizing that I'll never triumph in the family biscuit-baking department, I thought perhaps I could re-invent the tradition with my own recipe--a healthier version that I was also actually capable of making. I turned to the Moosewood Collective for their Buttermilk Biscuit recipe and (drumroll, please)...further demonstrated my incompetence.

Although they do taste scrumptious, and Adam and I thoroughly enjoy them, they still lack the flaky, soft texture (and "beautiful factor") of my mom's biscuits. I'm willing to admit it: it's not the recipes...it's ME!

Maybe the magic touch will come with age. Or maybe just more practice. Either way, I'll settle for these simple biscuits here at home, and look forward to the family version at my parents' house. No use in re-inventing tradition :)

Do you have any family tradition recipe?

Lower-Fat Biscuits
(Adapted from a recipe in the Moosewood Restaurant Low-Fat Favorites)

These guys taste just delightful, and with the added bonus of being low-fat, they make an appearance on our dinner table often. As always with biscuits--make sure you don't over-work the dough! Add more milk if needed to help the dough bind together.

Ingredients:
  • 1 1/2 cups unbleached white flour
  • 1/2 tsp. salt
  • 1 tsp. baking powder
  • 1 TBSP sugar
  • 2 TBSP canola oil
  • 6 TBSP skim milk (plus a little more if needed to bind the dough)
Directions:

1) Preheat oven to 350 degrees and prepare a baking sheet with cooking spray.

2) Combine flour, salt, baking powder, and sugar in a large bowl. Combine the oil and milk. Add the oil and milk to the flour mixture, stirring lightly and continuously until a soft dough forms (add just a dash more milk if needed to help dough bind).

3) Place dough onto a floured surface, and roll out using a rolling pin. Cut into 4 - 6 pieces (Mine are usually awkward shapes!).

4) Place on baking sheet and bake for about 15 minutes, until golden brown.


Thursday, October 14, 2010

Bringin' Back "Loaf"


Many thanks for all of the get well wishes you've sent my way! In my NyQuil-induced stupor, it has definitely brought a smile to face :)


Tonight we'll tackle a dish with the most un-flattering name, but a most delightful taste: Vegan Veggie Loaf. I know what you're thinking: tacking the word "loaf" onto a main course dish doesn't exactly conjure up images of a culinary masterpiece.


You'll need to move past the word "loaf" though, because this recipe really rocks. It's kind of like meeting a supermodel named Gertrude. Or Bertha. Don't judge a book by its cover, friends.


I first ran across the inspiration for this recipe at Nicci's blog, Nifty Eats. Her uber-unique and healthy recipe is reminscient of old-fashioned meatloaf...modernized and minus the meat of course. I added sauteed carrots and bell pepper to up the veggie factor, but you could certainly get creative with whatever mix-ins suit your fancy (if you're not committed to a vegan meal, I imagine shredded sharp cheddar would be an outstanding addition). This is also a great recipe if you're looking for a way to use up leftover cooked rice.

I'm hoping tonight will be the last night for NyQuil--I'm heading out on a road trip to Cleveland for the weekend, and my friend Katie has planned some delicious "Foodie" stops for us!


What's your favorite city/town to visit for fun Foodie destinations?


Vegan Veggie Loaf

(adapted from the Vegetarian Loaf recipe from Nicci's Nifty Eats)

As usual, get creative with your mix-ins to this highly-adaptable "loaf." Grated cheddar with go quite well if you're not tied to a vegan meal.

Ingredients:
  • 1 onion, diced
  • 1 carrot, shredded
  • 1/2 of a bell pepper, finely diced
  • 1 cup frozen peas
  • 4 cloves garlic, minced
  • a drizzle of olive oil
  • 1 cup cooked brown rice
  • 1 cup oats
  • 1/4 cup Italian seasoned bread crumbs (or your own homemade bread crumbs)
  • 3 TBSP ketchup
  • 3 TBSP barbeque sauce
  • 1/4 tsp. ground black pepper
  • salt to taste
  • garlic powder to taste
  • a sprinkling of brown sugar
  • Optional: shredded sharp cheddar cheese

Directions:

1) Preheat oven to 375 degrees. Spray cooking spray in a loaf pan.


2) Heat a little olive oil in a skillet over medium heat. Add onion, peas, carrot, and bell pepper. Saute until just barely softened (about 4 minutes). Remove from heat.


3) Combine all ingredients in a large bowl (including cheese, if you're using it)--mix it with your hands if you want! Put mixture into loaf pan, cover with foil, and bake for about 30 minutes. Allow to cool slightly/set up for 5 minutes before cutting (it doesn't come out in beautiful slices per se--a little on the crumbly side, but it still tastes as delicious as ever). Serve with salad or roasted veggies on the side.


Wednesday, October 13, 2010

Brownies and...NyQuil

Apparently it's cold season. And I'm not talking temperature.

My discovery of "cold season is upon us" arrived this morning when I woke up and realized I lacked the capacity to breathe through my nose. Awesome.

Given that my head feels like a lead balloon, I had to break my standing date with the kitchen tonight in favor of a much more alluring subject: the couch. The couch and I invited the latest issue of Newsweek and Hulu's re-runs of "Glee" to join us. It's been a double date of sorts.

But enough rambling--you didn't stop by to read my musings on the merits of NyQuil versus Therflu as a remedy for cold. You stopped by for more of what we all love: chocolate + peanut butter.

More specifically, Peanut Butter Fudge Brownies from the vegetarian goddess herself, Mollie Katzen. These rich cocoa brownies boast a full cup of all-natural peanut butter mixed right in. Plus dark chocolate chips for good measure (and yes, it has to be dark). The batter is so thick you'll think you made cookie dough, but it's no mistake! That thick n' doughy batter produces a dense, moist brownie with a subtle hint of peanut butter.

I'm thinking peanut butter frosting might be a necessity. Next time, friends. Definitely next time.

Fortunately, I baked these puppies a couple nights ago, prior to my "cold-season-is-upon-me" realization.

Forget chicken noodle soup. Vegetarians just need chocolate PB brownies to solve head congestion. And maybe a good dose of Nyquil.

Peanut Butter Fudge Brownies
(From Molly Katzen's Vegetable Heaven)

A full cup of natural peanut butter gives these guys a flavor burst unlike any chocolate + PB brownie you've tasted. The recipe calls for chocolate chips, but if you've got Reese's Cups sitting around (it is Halloween season...) I strongly urge you to chop them up and throw them into the batter.

Ingredients:
  • 1/2 cup butter, softened
  • 1 cup natural peanut butter
  • 1 cup brown sugar
  • 1/2 cup granulated sugar
  • 4 eggs
  • 1 tsp. vanilla
  • 1 cup unsweetened cocoa powder
  • 1 cup unbleached all-purpose flour
  • 1 1/4 cups dark chocolate chips (or chopped Reese cups)
  • Optional: peanut butter frosting (try Monet's recipe; I haven't yet, but I have no doubt that it rocks)
Directions:

1) Preheat oven to 350 degrees. Lightly grease a 9 x 13 inch pan with cooking spray.

2) With an electric mixer, cream together the butter, peanut butter, and sugars in a large bowl, on high speed. Reduce the speed to medium and add the eggs one at a time, beating well after each addition. Add vanilla. Add the flour and cocoa powder, and mix until just combined. Stir in chocolate chips.

3) Spread batter into prepared pan and bake for 15 - 20 minutes, or until the top feels firm and a toothpick inserted in the center comes out clean.

4) If you've got the time, whip up some peanut butter frosting, and smooth the nut buttery goodness all over the top (after the brownies have cooled, of course).


Tuesday, October 12, 2010

Curried Bulgur with Roasted Veggies


It's no secret that I'm a bit of a bulgur fanatic. After discovering this gem of a grain last year, I've been singing its praises ever since. Quick to prepare, perfect for salads or main dishes, and it's flavor can vary vastly depending on the liquid you soak it in.


Who needs couscous when you've got bodacious bulgur (I'm only mildly embarrassed that I just used the word "bodacious.")


Tonight's dinner recipe screams simplicity (not an angry scream; a friendly, cooking-happy scream). Better yet, it highlights one of my favorite flavor combos: curry, fruit, and toasted nuts. You could boost the protein-punch in this one by adding a can of rinsed, drained chickpeas. Additionally, I recommend adding a chopped red bell pepper--unfortunately I didn't have one on hand tonight.

Alongside our Curried Bulgur with Almonds and Apricots, we served roasted cauliflower. From beginning to end, dinner was ready in about 40 minutes.

If you're looking for more creative grain salad ideas, you might want to check out my Ode to Grains. (I know, I can't believe I wrote an Ode to Grains either).

Finally, what are your favorite cookbooks right now? I would love to hear what cookbooks and cooking magazines you're running to the most lately. We've definitely been heavy on the Moosewood volumunes and my old Cooking Light recipes, but I'm seeking some creative inspiration!

Curried Bulgur with Almonds and Apricots

This curried grain dish serves perfectly with roasted cauliflower. I included a little of both in each bite I took :)
Ingredients:
  • 2 cups broth (chicken or veggie)
  • 1 cut uncooked bulgur
  • 1/2 tsp. curry powder (or more if you're a curry fanatic)
  • Dash of cinnamon (maybe around 1/4 tsp.?)
  • 1 large onion, chopped
  • a little olive oil
  • 1 cup dried apricots, chopped
  • 1/2 cup chopped almonds, toasted
Directions:

1) In a small saucepan, bring broth to a boil. Remove from heat; stir in bulgur, curry, and cinnamon. Cover and allow to sit until broth is absorbed (20 - 30 minutes).

2) In a small skillet, heat a little olive oil over medium heat. Add onion and cook until softened and lightly browned, 6 - 7 minutes.

3) Add onion, apricots, and almonds to bulgur; stir until combined (You can also add chopped red bell pepper and chickpeas here, if desired.). Serve with roasted cauliflower (recipe below).

Parmesan-Roasted Cauliflower
(adapted from a recipe in The Biggest Loser Cookbook)

You haven't tasted cauliflower until you've tried this recipe. When I got this cookbook a few years ago, I made this recipe every week for quite some time!

Ingredients:
  • Florets from one head of cauliflower
  • a little drizzle of olive oil
  • 1/4 tsp. ground black pepper
  • 1/2 tsp. (or more!) of garlic powder
  • salt to taste
  • sprinkling of dried parsley
  • freshly grated Parmesan cheese
Directions:

1) Preheat oven to 425 degrees. Spray a baking sheet with cooking spray.

2) In a large bowl, drizzle just a bit of olive oil over the cauliflower florets (about 1 tablespoon?). Stir pepper, garlic powder, salt, and dried parsley in. Sprinkle some freshly grated Parmesan in and combine well.

3) Bake for 15 - 20 minutes, or until lightly browned (stirring once halfway through the cook-time).