
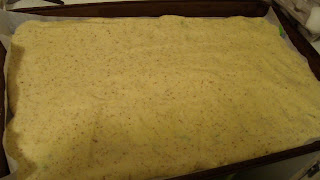
Please don't hold the following picture against me:

No, it's not a second grade art project. Nor is it a practical joke at a clown's birthday party.
Nope. This odd-looking treat is my attempt at this month's Daring Bakers Challenge.
It's a good thing that I love my job, because the results of this project are a fantastic reminder that I was meant to be a social worker...and not a pastry chef.
The January 2011 Daring Bakers' challenge was hosted by Astheroshe of the blog Accro. She chose to challenge everyone to make a Biscuit Joconde Imprime to wrap around an Entremets dessert.
Basically, the dessert is comprised of a sponge cake--with colored patterns baked into it--that serves as a wrapper for a dessert filling. The filling could be layers of custard, pastry cream, pudding, cheesecake filling, etc.
I can't lie: This challenge scared me a little from the get-go. I had never heard of this dessert before, and I also seemed incapable of pronouncing its name. I'd never made a pastry cream, let alone a "cake wrapper." Basically, I was a ticking time-bomb with this recipe, and it's no wonder I completed the challenge without a spontaneous explosion of custard in my kitchen.
Still, I had a great, messy time tackling this French dessert and, despite my epic flop, I enjoyed the wild ride. Plus, it still tasted delicious, which is always a bonus.
The filling for my dessert was a rich chocolate pudding (made only of melted chocolate and tofu), layered with crushed Oreos and an Oreo crust. The color designs in my jocande sponge were supposed to be purple and green, but they darkened a bit too quickly in the oven.
I definitely recommend this dessert if you're looking for a fun Saturday afternoon project, and you have lots of patience and precision in your baking. Below I've spared you a lengthy recipe in favor of a brief photo depiction of the steps you take to make this dessert.
Have you ever attempted a Joconde Imprime dessert? Share details, please!
Joconde Imprime and Entremets Dessert
(check out Martha Stewart's recipe for a good intro to this French treat)
Super-Simplified 5-Step Directions:
1) Make Patterned Joconde Paste:
- The decor paste is similar to a frosting in consistency, and food coloring can be used to achieve the colors you want for your joconde.
- Place your paste in a ziploc bag and cut off the tip. Then, create your own patterns on a large piece of parchment paper. Place the parchment paper on a large cookie sheet and freeze until hardened (about 20 - 30 minutes).

2) Make the Joconde Sponge Cake:
- While the paste is freezing, prepare the sponge cake batter, and preheat the oven to 475 (yes! It's VERY hot!).
3) Cake Goes in the oven:
- Remove the patterned paste from the freezer. Pour the cake batter over the pattern and spread evenly to coat. Bake for 8 - 10 minutes, or until cake is cooked through (don't over-bake!).
4) Prep the cake for wrapping:
- Flip the cake onto a piece of parchment covered with powdered sugar. Slice into strips of the appropriate size to fit your mold.

5) Set up the wrapper; pour in the filling
- Line the sides of springform pan with parchment paper. Make a crust to fill the bottom of the pan (I made an Oreo crust). Place the sliced cake wrapper around the edges of the pan, patterned side out. Layer your filling inside (I layered the tofu-chocolate pudding with crushed Oreos). Remove outer edge of springform pan; refrigerate dessert.

It may not look too pretty, but it sure is mighty tasty :)
Jaconde is my favorite, did you know, this was Mona Lisa's favorite dessert? Keep trying, soon enough it will be perfect. You can start using small ring molds, trying various patterns and tastes.
ReplyDeleteI think it looks good! Way better than anything I could do :)
ReplyDeleteI'm horrible at decorating, so I can sympathize...though I don't think your cake looks bad!
ReplyDeleteI think your cake looks ok for your 1st attempt. I will be proud of myself I can achieve this :D
ReplyDeleteWhoa...that IS daring. :) I've seen that technique but I've never ever tried it- you go girl! It looks very tasty! :)
ReplyDeleteWhat a fun idea. The cake looks really good to me. Thank you for sharing the technique.
ReplyDeleteHey there.The name of your blog is so catchy!.this is so daring.But I love your choice of colors for the imprint..makes the cake look like a fabric cover.First time here..will be back soon.
ReplyDeletethis sounds so good! stylish blogger! yay! http://wp.me/pZi0C-j0
ReplyDeleteOh gosh, this looks complex. You did better with it than I would have!
ReplyDeleteOh, girl! I can just imagine you wrasslin' with that bad boy. And by that, I mean I snorted when I read your comment about the first picture and then saw the Ordeal you had to go through to achieve that!
ReplyDeleteI'm so glad that the end result was just delicious!
Bless your heart! I can't believe you attempted this! I would have been terrified (and I bake quite a bit!) I think your cake turned out lovely...and I'm sure it tasted even better. Thank you for sharing, sweetheart. I hope you have a happy Saturday. Hugs and love!
ReplyDeleteI LOVE your post, you had me LOLing.
ReplyDeleteI had a similar experience this month. It looked, well, less than perfect, but still tasted fab.
so I'm just impressed you took on this challenge and I think it looks delicious!!
ReplyDeleteI actually think it looks awesome---lots of good stuff, and very creative! I could actually go for some right now :)
ReplyDeleteI agree with the other commenters - I think it looks wonderful! But even more importantly, it looks like it tastes fantastic!
ReplyDeleteYour to hard on yourself I think it looks good. And it sounds even better!
ReplyDeleteOh, whatever - I think your entremet looks fantastic!! I love your whimsical design, and also that you made a mousse with tofu. I was trying to avoid gelatin, and thought about going that route. This challenge was hardcore. Power to us home bakers for doing it! :D
ReplyDelete