Showing posts with label chocolate. Show all posts

Tuesday, May 31, 2011

I'll Take S'More Cupcakes, Please

S'mores make my heart dance, my tastebuds smile, and my hideously off-key voice sing. They're truly the edible essence of summer.

I'll be honest: marshmallows on their own don't do much for me. I don't like them jumbo or miniature, bunny-shaped or Halloween-themed, or even melted with my Rice Krispies.

But when those pillowy clouds of sugar are sandwiched between two sweet honey grahams and some milk chocolatey Hershey's goodness...Whew! Hellooooo, Marshmallow...

For Memorial Day weekend, I was eager to bring a summer-theme dessert to share at the family picnic. Although last year's blue ribbon winning S'More Bar Cookies were hard to beat, I was looking for something new to celebrate the arrival of summer.

Enter S'More Cupcakes.

I'll take s'more of those scrumptious cupcakes, please.

They're messy, they're gooey, and the tops are drizzled with more chocolate. Did I mention the rich chocolate buttercream?

Enough said. Let's get baking.

S'More Cupcakes

Nothing says summer like roasted marshmallows. When a bonfire isn't handy though, and you forgot to sharpen your marshmallow-roasting sticks, make these cupcakes for the potluck picnic instead.

Cupcake Ingredients:
  • Your favorite chocolate cupcake recipe, for 12 cupcakes (I used this fabulous recipe)
  • 1/2 cup milk chocolate mini chocolate chips
  • 1 cup graham cracker crumbs, divided
  • Mini marshmallows (about 6 per cupcake)
  • 1/2 cup semi-sweet chocolate chips
  • 2 tsp. milk
Chocolate Frosting Ingredients:
  • 10 TBSP butter, softened
  • 2 TBSP shortening
  • 3/4 cup cocoa powder
  • 3 - 3/4 cups powdered sugar
  • 3 - 5 TBSP milk
  • 2 tsp. vanilla extract
Directions:
1) Prepare chocolate cupcake batter (for 12 cupcakes). Stir in 1/2 cup graham cracker crumbs and 1/2 cup mini milk chocolate chips. Bake cupcakes as directed and cool completely.

2) To prepare frosting: Cream butter and shortening together until light and fluffy. Beat in cocoa powder until well-blended. Beat in powdered sugar in 1/2 cup increments, adding a little milk after each sugar addition. Add vanilla extract and mix frosting until thoroughly combined (add more sugar or milk to reach desired consistency).

3) To prepare chocolate drizzle: Melt semi-sweet chocolate chips and 2 tsp. milk together in the microwave (or over a double-boiler).

4) To assemble: Spoon frosting into a pastry bag fitted with a large star tip. Pipe frosting high onto cupcakes. Place about 5 - 6 mini marshmallows around the cupcake. Drizzle with semi-sweet chocolate drizzle and sprinkle with crushed graham cracker crumbs.

Friday, May 13, 2011

Homemade Oreos in the House

These little sandwich cookies will blow your Oreo-loving mind.

Seriously.

The cream filling is indistinguishable from the stuff you'll find in their prepackaged counterparts. The chocolatey cookies will remind you of a softer version of their crispy, store-bought twins.

And don't even get me started on their cute, bite-size nature. Bite size = more cookies per serving.

Friends, let's just say these Oreo taste-alike treats are pretty darn delicious. Adam even went so far as to say they're the best cookies that have come out of the Hungry Spoon kitchen.

Really? The man's mother is practically a professional baker. How can I compete with that?

Apparently I just did :)

In addition to their fabulous tasty-factor, these cookies have so much potential for creativity. The cream filling can be dyed to color-coordinate with a party theme. Try adding mint extract and sneaking an Andes mint into the cream filling of each cookie sandwich. Or, add more filling, and roll the edges of each cookie in sprinkles.

Infinite possibilities!

One caveat to keep in mind: The dough is sticky and can be hard to manage! Keep the dough you're not working with in the refrigerator. The next time I make them (tonight?), I may actually experiment with freezing the dough.

Ultimately, just remember the moral of today's story: Once you go homemade Oreo, you may never go back.

Homemade Oreos

These classic little cookies will take you straight back to your childhood--be sure to enjoy with a tall glass of milk. And remember: the dough is very sticky. You may want to freeze it prior to using.

Cookie Ingredients:
  • 3/4 cup shortening
  • 1 cup sugar
  • 1 - 1/2 tsp. vanilla extract
  • 1/2 cup milk
  • 1 - 2/3 cups flour
  • 3/4 cup cocoa powder
  • 2 tsp. cornstarch
  • 1/2 tsp. salt
  • 1/4 tsp. baking soda
Cream Filling Ingredients:
  • 1/4 cup butter
  • 1/4 cup shortening
  • 2 - 1/2 to 3 cups powdered sugar
  • 1 - 1/4 tsp. vanilla extract
Directions:
1) Cream the shortening and sugar on medium-high speed until light and fluffy. Add the vanilla and milk and beat until well-combined. Add remaining ingredients and mix well. Refrigerate dough for at least 4 hours (or, try freezing it? I'm going to experiment with this step).

2) Preheat oven to 325 degrees. Line a cookie sheet with parchment paper. Cut another piece of parchment paper about the size of the cookie sheet you will be using. Divide the dough into 4 large chunks. Place 3 chunks back in the refrigerator, and place the remaining dough piece on the parchment paper. Cover dough with another piece of parchment paper, and use a rolling pin (on top of the parchment) to roll the dough into a disc about 1/8 - 1/4 inch thick.

3) Use a 1 - 1/2 inch cookie cutter (or, I used the rim of a shot glass!) to cut the cookies. Use a thin spatula (or careful hands) to place cookies on another piece of parchment paper. Be careful! Again, the dough is sticky and can be tricky to work with :)

4) Bake for 10 - 12 minutes. Allow to cool briefly on the cookie sheet, then transfer to a wire rack to cool completely. Repeat procedure with remaining dough.

5) To prepare the filling, cream the shortening and butter until light and fluffy. Beat in the vanilla, and mix the powdered sugar in slowly. Filling should be thick and pliable.

6) To prepare your sandwich cookies, spread the filling on the bottom of one cookie, and top with another cookie. Repeat with remaining cookies.


Wednesday, April 6, 2011

I'll Take Chocolate in My Cookies, Please.

My intern's favorite type of cookie is Oatmeal Raisin.

Yes, I said raisin.

I tease him about this mercilessly. He tells me raisins are what all the cool kids are doing these days. I tell him I've always been a nerd.

A nerd who prefers chocolate and peanut butter and pecans in her cookies.

But who am I to question a person's cookie preference? Desserts are such a personal thing. And if everyone in the office loved chocolate, the treat-to-person ratio would be far smaller when someone brings a plate full of cupcakes in for sampling.

So, I'll give my intern a pass on the whole Oatmeal Raisin Cookie thing. I promised I would make him a batch before he graduates next month. In the meantime, I'm taking baby steps by starting with Banana-Oatmeal-Chocolate Cookies.

Did I mention they're vegan?

Vegan-licious, that is. They're moist and tasty and full of banana + milk chocolate flavor (Note: for truly vegan cookies, you'll need to use vegan chocolate, as opposed to milk chocolate. I was willing to sacrifice their full vegan nature in the name of milk chocolate). Adam says, "They're great. But they taste too healthy to be a cookie."

That's my guy. Looks like I just found an excuse to make brownies this weekend :)


Chocolate Banana-Oat Cookies

I definitely wouldn't call these a "health" cookie--unless you count adding oats to a dessert as healthy. And definitely go with the pure milk chocolate on this one--Although, that de-veganizes the recipe, I feel like milk choco is getting the shaft in all the trendy chocolate recipes lately...and her good taste and flavor just shouldn't be passed up.

Ingredients:
  • 1 large, super-ripe banana (it's got to be browning!)
  • 1/3 cup canola oil
  • 2/3 cup sugar
  • 1 tsp. vanilla extract
  • 3/4 cup unbleached, all-purpose flour
  • 2 tsp. ground flaxseed
  • 1/2 tsp. baking soda
  • 1/4 tsp. salt
  • 1/4 tsp. ground cinnamon
  • 2 cups rolled oats
  • 3/4 cup milk chocolate chunks
Directions:
1) Preheat oven to 350 degrees. Coat a baking sheet with cooking spray and set aside.

2) In a large mixing bowl, mash the banana. Stir in the oil, sugar, and vanilla. Add the dry ingredients and stir until well-combined. Fold in chocolate chunks.

3) Drop the dough by rounded tablespoon-fuls on the prepared baking sheet. Bake for 8 - 10 minutes, or until lightly browned around the edges (remember--it's always acceptable to under-bake vegan cookies).


Sunday, March 27, 2011

Company-is-Coming Breakfast

The March 2011 Daring Baker's Challenge was hosted by Ria of Ria's Collection and Jamie of Life's a Feast. Ria and Jamie challenged the Daring Bakers to bake a Yeasted Meringue Coffee Cake.

The next time you have company visiting overnight, you MUST make this Coffee Cake. Seriously. It's going to be a new company-is-coming breakfast requirement at your house. It definitely is at mine.

Once again, the
Daring Bakers put my baking skills to the test with a delightful treat I'd never heard of, much less attempted in the kitchen. This breakfast ring is essentially a yeast coffee cake, filled with chocolate and nuts.

It tastes like a chocolate-loaded pastry straight off the rack at Panera. Only ten times better.

And honestly, it wasn't near as difficult as I expected (far easier and less awkward to work with than the
Stollen). The best part? Definitely the ooey gooey chocolate in the middle, which firms up beautifully once the bread has cooled.

We've all got our company-is-coming breakfast treats. Growing up, my mom always made Cinnamon-Sugar Monkey Bread for breakfast visitors. I hadn't found my own visitor breakfast niche yet...until I baked this baby last week.

Consider my niche found.

Yeasted Meringue-Chocolate Coffee Cake
(recipe from Jamie at Life's a Feast)

Dough Ingredients:
  • 2 cups flour
  • 2 TBSP sugar
  • 1/4 + 1/8 tsp. salt
  • 1 - 1/8 tsp. yeast
  • 1/4 + 2 TBSP milk
  • 2 TBSP water
  • 1/4 cup butter at room temperature
  • 1 large egg
Meringue Ingredients:
  • 2 egg whites
  • 1/8 tsp. salt
  • 1/4 tsp. vanilla
  • 1/4 cup sugar
Filling Ingredients:
  • 1/2 cup chopped pecans
  • 1 TBSP sugar
  • 1/4 tsp. cinnamon
  • 3/4 cup semi-sweet chocolate chips
Topping:
  • More semi-sweet chocolate chips! (about 1/2 - 3/4 cup?)

Directions:
1) In a large mixing bowl, combine 1 cup flour, sugar, salt and yeast. Set aside.

2) In a small saucepan, combine the milk, water, and butter and heat until just warmed and the butter is melted.

3) Add the butter mixture to the flour mixture with your mixer on low speed. Mix until well-combined. Increase mixer speed and beat for about 2 minutes. Add egg and 1/2 cup flour and beat for another 2 minutes.

4) Stir in the remaining 1/2 cup of flour. Turn dough onto a lightly floured surface and knead for 8 - 10 minutes until it is smooth and elastic (add more flour as neeeded).

5) Place dough in a bowl coated with cooking spray and turn to coat. Cover the bowl and allow it to rest in a warm place, undisturbed, for an hour (it should double in size).

6) Meanwhile, prepare your filling: Combine the cinnamon and sugar together in a small bowl.

7) Once the dough has doubled in size, prepare your meringue: Beat the egg whites and salt together on high speed until light and foamy. Add the vanilla, and start adding the sugar 1 TBSP at a time. Continue beating until stiff, glossy peaks form.

8) Line a baking sheet with parchment paper and preheat the oven to 350 degrees. Punch dough down and roll into a rectangle (about 20 x 10 inches). Spread the meringue over the rectangle, leaving a 1 - 2 inch border around the edges. Sprinkle the cinnamon-sugar on top, then the nuts, and then the chocolate chips.

9) Roll the rectangle up, jelly-roll style, from the long end. Transfer the rolled log (funny terminology, isn't it?) onto the prepared baking sheet, seam-side down. Pull the two ends together to form a wreath/ring shape, and pinch the edges together to seal. Use a sharp knife to cut slits around the ring, a few inches apart from each other.

10) Cover the coffee cake ring with plastic wrap and set in a warm place for about 60 minutes to rise.

11) Bake for 25 - 30 minutes, or until golden and risen.

12) Once the coffee cake has cooled, melt the chocolate chips in the microwave. Spread or drizzle over the top of the coffee cake and allow to cool and solidify before serving.


Wednesday, March 23, 2011

PB Cup Blizzard...Non-Dairy, Dark Chocolate Style

It's no secret that chocolate + peanut butter is one of my weaknesses in life.

Faced with a jar of natural nut butter and a side of chocolate, I'm utterly defenseless. Any sense of restraint or self-control I once had goes out the window.

Give me a spoon, and let's get this job done.

Fortunately, many of you share my addiction. When I saw Kat's recipe for a homemade Peanut Butter Cup Blizzard this weekend, I was instantly hooked. So hooked in fact, that I went in the kitchen and made these tasty little treats the very same night.

I must warn you though: These treats are most definitely for the dark chocolate lovers out there, such as myself. They're apparently not designed for someone who requires super-sweet, milk chocolate. I realized this when Adam took a bite and scrunched up his nose. "What kind of chocolate did you use?"

It's called cocoa powder, buddy. It doesn't come in the form of a Hershey bar, a brownie, or a chip.

Oh, husbands.

Kat's recipe made 5 - 6 soft mini peanut butter cups. They don't fully solidify, so you might need a spoon if you choose to eat 'em on their own. I whipped up a batch of banana soft serve though, and tossed in 2 peanut butter cups to complete my rockin' blizzard.

Dairy Queen may never see me again.

Peanut Butter Cup Blizzard...The non-dairy, dark chocolate way
(recipe adapted from Kat's at Keep n' The Faith)

These PB cups won't freeze solid--they stay a little soft, which is a-okay since you're tossing them into a bowl of whipped banana goodness. I apologize for not having a picture of the Blizzard itself--I gobbled that baby up before I had time to snap a pic!

Ingredients:
  • 2 TBSP unsweetened almond milk
  • 1 - 1/2 TBSP honey
  • 3 - 1/2 TBSP cocoa powder
  • natural peanut butter
  • 1 recipe banana soft serve
Directions:
Melt the honey and milk together. Stir in cocoa powder until desired consistency and flavor is reached (you can add more cocoa powder if you like!). Spoon a small amount of chocolate mixture into the bottom of 5 mini muffin cup liners.* Place a tiny dollop of natural nut butter on top. Spoon the remainder of the chocolate on top of the nut butter. Freeze over night (if you can wait). Enjoy plain, or stir into your banana soft serve for a blizzard-like treat!

*Alternately, if you'd like your PB cups to solidify more, you can stir some nut butter right into the chocolate mixture and THEN poor the mixed version into the muffin cup liners.


Tuesday, March 1, 2011

Nutella Chocolate Chip Blondies


Since yesterday's post highlighted a dinner recipe that we made twice in one week, I figured I should follow it up with a dessert recipe I made twice in one week.

Nutella Chocolate Chip Blondies.

Oh yes I did.

When I saw these Nutella-laden treats on Lindsey's blog last week, my destiny was set. I had a lonely jar of unopened Nutella sitting in my kitchen, just begging to be used. As an added bonus, this recipe is a super-easy, one-bowl creation.

And as if there wasn't enough buttery, chocolate-hazelnut goodness in these little bars, I added a handful of chocolate chips for good measure.

The first batch went to one of Adam's lab-mates to celebrate her 27th birthday (27 is a good year, right? I'm only four weeks in myself, but I'm already loving it). Their rave reviews inspired me to bake a second batch for my kids at work. I've learned the cookies are a wonderful motivator and mood-enhancer for high school students.

If you, too, are rocking the lonely, unopened jar of Nutella situation right now, tonight's recipe just may be the solution to your woes.

Nutella Swirl Blondies
(recipe from Lindsey at Gingerbread Bagels)

The original recipe doesn't have chocolate chips, but I'm all about adding unnecessary chocolate to already delicious recipes. I'm planning on experimenting with the addition of peanut butter to this recipe as well...

Ingredients:
  • 1 cup unbleached, all-purpose flour
  • 1/8 tsp. baking soda
  • 1/4 tsp. salt
  • 1/2 tsp. baking powder
  • 1 cup brown sugar
  • 1/3 cup butter, melted
  • 1 TBSP vanilla
  • 1 egg
  • 1/2 cup chocolate chips
  • 1/4 cup Nutella (approximately)
Directions:
1) Preheat oven to 350 degrees and coat an 8 x 8 inch baking pan with cooking spray.

2) Use an electric mixer to combine the brown sugar, butter, and vanilla--beat until well-combined. Beat in egg. Mix in dry ingredients until thoroughly combined. Stir in chocolate chips.

3) Spread batter evenly in prepared baking dish. Place small spoonfuls of Nutella (about 1 tsp. drops) on top of the batter. Use a knife to cut through the batter in different directions, producing a swirly pattern with the Nutella. Bake for 20 minutes, or until edges are lightly browned.

Sunday, February 20, 2011

Classic Birthday Cupcakes


When I think of a truly classic birthday cake combination, I immediately picture vanilla cake with chocolate buttercream frosting and rainbow sprinkles.

To be honest, my vanilla cake/chocolate frosting/rainbow sprinkles birthday fantasy is also accompanied by other 1950s housewife-ish images. I would be lying if I said my imaginary birthday scenario didn't include a ruffled waist apron and a flaired-skirt dress with polka dots.

Half of this classic birthday scene unfolded this weekend. While I was able to create the ultimate vanilla cupcake, piled high with spoonfuls of chocolate buttercream, there were unfortunately no ruffled aprons or high heels involved. My friend Kate celebrated her 30th year, and sprinkled cupcakes were definitely in order.

The recipe for these sweet treats hails from my top-notch favorite dessert cookbook: Vegan Cupcakes Take Over the World. The cupcakes were so moist. I've officially declared this my new go-to vanilla cake recipe. And although I'm always one to lean towards chocolate buttercream, these mini-cakes would also go great with vanilla or lemon frosting, garnished with sliced strawberries.

Maybe in another life I'll get my chance at the 1950s housewife thing. In the meantime I'll keep rocking the whole feminist-of-the-millenium identity...which definitely involves cupcake-baking.

What's your favorite birthday cake?

Classic Vanilla Cupcakes with Chocolate Buttercream

These cupcakes are moist, light, and the just the right amount of sweetness. While chocolate buttercream goes perfectly, I'd encourage you to go wild with your frosting options. Experiment with lemon buttercream, orange cream cheese frosting, or even a rich chocolate ganache.

Cupcake Ingredients:
  • 1 cup milk, any kind
  • 1/3 cup oil
  • 3/4 cup sugar
  • 2 tsp. vanilla extract
  • 1 - 1/4 cups unbleached, all-purpose flour
  • 2 TBSP cornstarch
  • 3/4 tsp. baking powder
  • 1/2 tsp. baking soda
  • 1/2 tsp. salt
Frosting Ingredients:
  • 1/2 cup real butter (or non-hydrogenated vegan margarine) at room temperature
  • 1/2 cup cocoa powder
  • 2 - 1/2 cups powdered sugar
  • 1 tsp. vanilla extract
  • 3 - 4 TBSP milk
Directions:
1) To prepare cupcakes: Preheat oven to 350 degrees and line a muffin tin with cupcake liners. Use an electric mixer to beat together the milk, oil, sugar, and vanilla. Mix in the dry ingredients until well-blended and lumps are gone!

2) Fill each cupcake liner about 2/3 -- 3/4 of the way full. Bake for 20 - 24 minutes, or until a toothpick inserted in the center comes out clean. Allow to cool completely before frosting.

3) To prepare frosting: Use an electric mixer to beat together the butter and cocoa powder. Beat in the vanilla extract. Alternately add powdered sugar and milk until frosting is light and fluffy and has reached a desirable spreading consistency. Frost cupcakes liberally and top with rainbow sprinkles :)

Friday, February 11, 2011

Bakin' My Way to His Heart


I'm not afraid to admit it: I love Valentine's Day.

I spent the better part of my insanely awkward teenage years wishing I had a Valentine, and yet still celebrating the holiday with my equally awkward girlfriends. We embraced our glasses-wearing, brace-faced, frizzy-haired selves, and reveled in V-Day slumber parties that involved lots of raw cookie dough, prank phone calls, and late-night viewings of "Loveline with Dr. Drew."

I was the classic dorky teenager.

Today, I'm fortunate enough to have secured a somewhat permanent, and exceptionally stellar Valentine in my life. This guy draws me pictures of stick figures, cleans off my KitchenAid stand mixer, and warms up my car every morning. He also puts up with my hideous singing voice, my resistance to putting clean dishes back in the cabinet, and my minor obsession with Coldstone Creamery's Cake Batter ice cream.

To thank my sweet dude for all the ways he shows he cares, I baked my way to his heart. This year, it came in the form of Chocolate-Dipped Cherry Shortbread Cookies.

Buttery. Flaky. Pink. And chock full o' love.

These little cookies are subtly sweet and just plain precious. Semi-sweet chocolate was a perfect match, but I imagine that white chocolate or dark chocolate would go equally as well.

So, whether your Valentine is your significant other or your best friend, your mom or your favorite co-worker--there's always someone out there who could use a little lovin' from you.

Bake up some Cherry Heart Cookies for them this weekend. And be grateful you don't have braces anymore.

Chocolate-Dipped Cherry Shortbread Hearts
(recipe from
Taste of Home)

These cookies look like the essence of Valentine's Day. Pink + Chocolate + Hearts. Bonus: They taste awesome and buttery!

Ingredients:
  • 1 - 1/4 cups unbleached, all-purpose flour
  • 3 TBSP sugar
  • 1/2 cup cold butter, cubed
  • 1/2 cup maraschino cherries, drained and chopped
  • 1 TBSP cold water
  • 1/2 tsp. almond extract
  • 1 cup semi-sweet chocolate chips
  • 1 TBSP butter
Directions:

1) Preheat oven to 325 degrees and coat a baking sheet with cooking spray.

2) In a mixing bowl, combine the flour and sugar. Cut in butter and mix with a fork until crumbly. Gently add in cherries, water, and extract--be gentle! Shortbread can be tricky :) Feel free to add a dash more of water to hold the dough together if you need to.

3) On a lightly floured surface, gently roll/pat the dough out to 1/4 inch thickness. Cut using small heart cookie cutters and place on a baking sheet. Bake for 20 - 25 minutes, or until lightly browned. Allow to cool on a cooling rack.

4) In a double boiler, melt the chocolate chips and 1 TBSP butter. Dip half of each cookie in the chocolate and place on wax paper to cool. Give to your Valentine.

Monday, February 7, 2011

Chocolate for Breakfast

Chocolate muffins are really just an awesome excuse to eat cupcakes for breakfast, right?

When I saw Monet's recipe for double-chocolate muffins a couple weeks ago, I knew I had to give them a try. (Remember how good her chocolate bread was?)

And while I can't bring myself to indulge in chocolate for breakfast, I knew Adam's lab-mates would have no difficulties polishing off a dozen of these "morning" treats without a second thought. Every guy in that brainy bunch somehow manages to maintain the metabolism of a 14 year old boy.

Ultimately, they raved that these muffins are chocolate intense--in the best possible way. Moist and tender and oh-so-chocolatey, they'll make the perfect breakfast treat for your co-workers, your neighbor, or your warp-speed-metabolism self.

Eat up! You're having cupcakes...er, muffins...for breakfast.

Double-Chocolate Muffins
(recipe from Monet at "Anecdotes and Apple Cores")

These muffins would make a wonderful Valentine's Day breakfast treat for someone special. Or, you could top them with peanut butter frosting and disguise them as a cupcake. No one would know the difference :)

Ingredients:
  • 2/3 cup cocoa
  • 1 - 3/4 cup all-purpose flour
  • 1 - 1/4 cups brown sugar
  • 1 tsp. baking powder
  • 1 tsp. baking soda
  • 3/4 tsp. salt
  • 1 egg
  • 1 cup milk
  • 2 tsp. vanilla
  • 2 tsp. vinegar
  • 1/2 cup butter, melted
  • 1 cup chocolate chips
Directions:
1) Preheat oven to 400 degrees. Line muffin tin with muffin liners (or coat with cooking spray).

2) In a large mixing bowl, mix the dry ingredients together. In a medium-size mixing bowl, whisk together the egg, milk, vanilla, vinegar, and butter. Gently fold the wet ingredients into the dry ingredients--don't over-mix! Fold in the chocolate chips.

3) Fill muffin cups (I filled mine pretty high!) and bake for 20 - 25 minutes. This made 12 muffins, plus 2 extra jumbo muffins.

Thursday, January 27, 2011

Why I'm Not a Pastry Chef

Please don't hold the following picture against me:

No, it's not a second grade art project. Nor is it a practical joke at a clown's birthday party.

Nope. This odd-looking treat is my attempt at this month's Daring Bakers Challenge.

It's a good thing that I love my job, because the results of this project are a fantastic reminder that I was meant to be a social worker...and not a pastry chef.

The January 2011 Daring Bakers' challenge was hosted by Astheroshe of the blog Accro. She chose to challenge everyone to make a Biscuit Joconde Imprime to wrap around an Entremets dessert.

Basically, the dessert is comprised of a sponge cake--with colored patterns baked into it--that serves as a wrapper for a dessert filling. The filling could be layers of custard, pastry cream, pudding, cheesecake filling, etc.

I can't lie: This challenge scared me a little from the get-go. I had never heard of this dessert before, and I also seemed incapable of pronouncing its name. I'd never made a pastry cream, let alone a "cake wrapper." Basically, I was a ticking time-bomb with this recipe, and it's no wonder I completed the challenge without a spontaneous explosion of custard in my kitchen.

Still, I had a great, messy time tackling this French dessert and, despite my epic flop, I enjoyed the wild ride. Plus, it still tasted delicious, which is always a bonus.

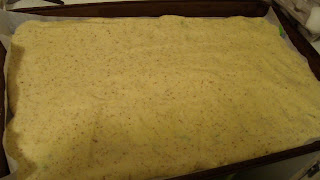
The filling for my dessert was a rich chocolate pudding (made only of melted chocolate and tofu), layered with crushed Oreos and an Oreo crust. The color designs in my jocande sponge were supposed to be purple and green, but they darkened a bit too quickly in the oven.

I definitely recommend this dessert if you're looking for a fun Saturday afternoon project, and you have lots of patience and precision in your baking. Below I've spared you a lengthy recipe in favor of a brief photo depiction of the steps you take to make this dessert.

Have you ever attempted a Joconde Imprime dessert? Share details, please!

Joconde Imprime and Entremets Dessert
(check out Martha Stewart's recipe for a good intro to this French treat)

Super-Simplified 5-Step Directions:

1) Make Patterned Joconde Paste:
  • The decor paste is similar to a frosting in consistency, and food coloring can be used to achieve the colors you want for your joconde.
  • Place your paste in a ziploc bag and cut off the tip. Then, create your own patterns on a large piece of parchment paper. Place the parchment paper on a large cookie sheet and freeze until hardened (about 20 - 30 minutes).
2) Make the Joconde Sponge Cake:
  • While the paste is freezing, prepare the sponge cake batter, and preheat the oven to 475 (yes! It's VERY hot!).
3) Cake Goes in the oven:
  • Remove the patterned paste from the freezer. Pour the cake batter over the pattern and spread evenly to coat. Bake for 8 - 10 minutes, or until cake is cooked through (don't over-bake!).
4) Prep the cake for wrapping:
  • Flip the cake onto a piece of parchment covered with powdered sugar. Slice into strips of the appropriate size to fit your mold.
5) Set up the wrapper; pour in the filling
  • Line the sides of springform pan with parchment paper. Make a crust to fill the bottom of the pan (I made an Oreo crust). Place the sliced cake wrapper around the edges of the pan, patterned side out. Layer your filling inside (I layered the tofu-chocolate pudding with crushed Oreos). Remove outer edge of springform pan; refrigerate dessert.
It may not look too pretty, but it sure is mighty tasty :)

Saturday, January 22, 2011

Cookies on the Brain


For some households, cookie season ends right around the New Year...about the same time the Christmas decorations are packed away, and everyone is vowing to a year of healthy decisions.

Fortunately, the Hungry Spoon cookie season lasts 365 days a year. We never tire of new cookie recipes. Plus, it's critical to practice your cookie-making skills throughout the year so you're fully prepared for the next holiday season.

I guess this makes cookie-baking a pretty self-less act then. (I've become fairly good at rationalizing my baking compulsions, haven't I?)

At any rate, this week Adam was hungry for Chocolate Crinkle Cookies, and I was eager to deliver. I created a new recipe based on one in my favorite cookie cookbook: Vegan Cookies Invade Your Cookie Jar.

My use of non-vegan vanilla yogurt and non-vegan chocolate chips stripped them of their virgin vegan status, but I'm not complaining. The yogurt contributed to a ridiculously moist crumb, and the double-shot of chocolate (from both cocoa powder and melted chocolate chips) made these cookies blue ribbon winners in our house.

Cheers to a cookie-baking season that lasts 365 days a year!

Chocolate Crinkle Cookies
(adapted from a recipe in Vegan Cookies Invade Your Cookie Jar)

These bite-size cookies are the perfect treat to pair with a cup of coffee, sneak into your favorite person's lunch bag, or just to munch on while you're cooking dinner :)

Ingredients:
  • 1/2 cup sugar
  • 1/4 cup oil
  • 3 TBSP non-fat vanilla yogurt
  • 1 tsp. vanilla extract
  • 1/3 cup milk (I used skim)
  • 1 TBSP ground flaxseed
  • 1/2 cup dark chocolate chips, melted (I simply melted mine on a double boiler)
  • 1 - 1/4 cups all-purpose flour
  • 2 TBSP cocoa powder
  • 3/4 tsp. baking powder
  • 1/4 tsp. salt
For the coating:
  • 1/3 cup granulated sugar
  • 3/4 to 1 cup powdered sugar, sifted
Directions:
1) Preheat oven to 325 degrees and coat baking sheets with cooking spray.

2) In a large bowl, mix the sugar, oil, yogurt, vanilla, milk, flaxseeds, and melted chocolate until smooth. Stir in the flour, cocoa powder, baking powder, and salt. You will have a thick, moist dough. Refrigerate for about 45 minutes.

3) Meanwhile, place the sifted powdered sugar on a large plate, and pour the granulated sugar in a small bowl. To prepare the cookies, take a large, rounded tablespoon of dough, roll it in a ball, roll it in the granulated sugar, and then roll it in the powdered sugar. Place on the baking sheet and repeat until the dough is gone.

4) Bake cookies for about 11 - 12 minutes, or until they're puffed and cracked. Allow to cool and gobble them up--I swear they taste like brownie cookies :)

Monday, January 17, 2011

Cupcake Believer


In my previous life, I wasn't much of a cupcake person. I preferred a big ol' honkin' slice of cake.

I feared the cupcake because it seemed to dictate its serving size to me: One cupcake is one serving. With a full cake though, a serving is a slice...and your slice can be as big as you want it to be. That's my kind of serving size.

However, I've become a cupcake believer over time. They're cute, they're snack-size, and they're rich with decorating possibilities. Plus, as I near the ripe old age of 27, it's probably not such a bad idea that my food start to dictate its serving size to me.

Given my recent affinity for the cup o' cake dessert, I was thrilled to receive Vegan Cupcakes Take Over the World as an early birthday present from my in-laws this weekend (They also gifted me with the unbeatable Veganomicon. Adam's parents clearly have impeccable cookbook taste).

This cookbook rocked my fuzzy socks right off my feet. We're talking over 100 pages of toasted coconut cupcakes, lemon-blueberry cupcakes, banana split cupcakes...and lots of dark chocolate ganache.

I may never go back to full-size cakes again.

Do you need a little push to become a cupcake believer? Try today's recipe: Chocolate Yogurt Cupcakes with Peanut Butter frosting. I adapted their recipe quite a bit to work with ingredients I had on hand, which resulted in a non-vegan cupcake with ever-so-slightly less fat than the original recipe (secret ingredient: vanilla yogurt).

The non-optional key to this recipe? The peanut butter frosting. Oh heavens, yes.

If these choco-peanut butter love bugs don't make you a cupcake believer, I don't know what will.

Chocolate Yogurt Cupcakes with Peanut Butter Frosting
(adapted from a recipe in Vegan Cupcakes Take Over the World by Isa Chandra Maskowitz and Terry Hope Romero)

I subbed in non-fat vanilla yogurt for a significant amount of the oil in this recipe. You won't even notice...especially with those mounds of peanut butter frosting on top. And please note, this recipe is NOT vegan! This recipe makes 14 - 15 cupcakes

Cupcake Ingredients:
  • 2/3 cup semi-sweet chocolate chips
  • 1/2 cup vanilla yogurt (I used nonfat)
  • 1/2 cup milk (I used skim)
  • 3/4 cup sugar
  • 1/3 cup canola oil
  • 1 tsp. vanilla extract
  • 1/2 tsp. almond extract
  • 1 TBSP instant coffee granules
  • 1 cup + 2 TBSP all-purpose flour
  • 1/4 cup cocoa powder
  • 1/2 tsp. baking soda
  • 1/4 tsp. salt
Peanut Butter Frosting Ingredients:
  • 10 TBSP butter, at room temperature
  • 2/3 cup no-stir, natural creamy peanut butter
  • 2 tsp. vanilla extract
  • 2 - 1/2 cups confectioner's sugar
  • 2 - 4 TBSP milk
  • Chopped peanut butter cups
Directions:
1) Preheat oven to 350 degrees and line a 12 cup muffin tin with cupcake liners (after filling the 12 cupcake cups, I poured the extra batter into 2 ramekins for 2 additional gi-normous cupcakes).

2) Melt the chocolate chips in a double boiler and set aside. In a large mixing bowl, mix together the yogurt, milk, sugar, oil, vanilla extract, and almond extract. Sift in the remaining ingredients and beat well with an electric mixer (about 2- 3 minutes). Stir in the melted chocolate.

3) Pour batter into cupcake liners, filling only 2/3 full. Bake for 23 - 26 minutes, or until toothpick inserted in the center comes out clean. Allow to cool completely before frosting.

4) To prepare the frosting, beat the butter and peanut butter together; beat in the vanilla extract. Slowly sift in the confectioner's sugar while continuously beating and add 1 - 2 TBSP of milk (whatever is needed to get the frosting to spreading consistency).

5) When cupcakes have cooled, frost each one generously with the peanut butter frosting. Top with chopped Reese's peanut butter cups.

Monday, January 3, 2011

Dough-Lovers Anonymous

I love vegan cookie dough.

Although the risk of salmonella poisoning never stops me from devouring regular cookie dough, I hold back nothing when it comes to consuming vegan cookie dough. Is there a 12-step program for dough-loving fools like myself? I fear I'll one day reach a point where I simply turn off the oven, grab a spoon, and call it quits on baking altogether.

Okay, probably not. But I'm close.

This weekend I made some vegan dough and (reluctantly) baked them into chewy, yummy Chocolate-Cherry-Almond Cookies. Think Black Forest Cake meets Sugar Cookie. I love taking the flavors of decadent desserts and baking them into bite-size cookie form.

These cookies are adapted from a recipe I found in my favorite dessert cookbook: Vegan Cookies Invade Your Cookie Jar. This cookbook has taught me the basics of vegan baking, and I've learned that flaxseed and canola oil are truly the best friends of stellar vegan cookie.

And friends, this is one seriously stellar cookie.

Do you have any favorite vegan dessert recipes? Share your link below!

Chocolate-Cherry-Almond Cookies
(recipe adapted from one found in Vegan Cookies Invade Your Cookie Jar)

For me, the essence of a good cookie is in its chewy-ness factor. Do NOT give me a cake-like cookie. A cake-like cookie is just what it is: a miniature cake that simply doesn't fit in the cookie category. These cookies are definitely rocking a perfect chewy factor.

Ingredients:
  • 2/3 cup canola oil
  • 2/3 cup sugar
  • 2/3 cup brown sugar
  • 6 TBSP vanilla almond milk (unsweetened)
  • 2 heaping tablespoons of ground flaxseed
  • 2 tsp. vanilla extract
  • 1 - 1/4 tsp. almond extract
  • 1 cup all-purpose flour
  • 1 cup oat flour (whir one cup of oats in your food processor)
  • 1/2 tsp. baking soda
  • 1/2 tsp. salt
  • 3/4 cup semi-sweet chocolate chips or white chocolate chips (or a rockin' mixture of both!)
  • 3/4 cup chopped, toasted almonds
  • 1/2 cup chopped dried cherries
Directions:
1) Preheat oven to 350 degrees and coat 2 large baking sheets with cooking spray.

2) In a large bowl, whisk together the oil, sugars, milk, flaxseed, and extracts until thoroughly combined. Stir in the flours, baking soda, and salt. Fold in the almonds, chocolate chips, and cherries.

3) Drop dough by spoonfuls onto the baking sheets and bake for 10 - 11 minutes, or until the edges are lightly browned. Eat up!