Thursday, September 30, 2010

Speedy Supper

What do you whip up for dinner when you're short on time and have a mile-long to-do list?

Flatbread pizzas!

Typically, I make homemade pizza at the speed of most things I create in the kitchen: slow as a turtle. I make speedy cooks cringe. I adore the dough-making process, I love mounding every veggie in the fridge on top, and I crave whatever random combination of cheeses cover the top (Gorgonzola anyone?).

But today, it just wasn't happening. With a major event at my work this weekend (we're hosting a former "Biggest Loser" contestant!), and company arriving tomorrow (Adam's parents are visiting for the weekend), I knew a night of warp-speed cleaning and baking was in store.

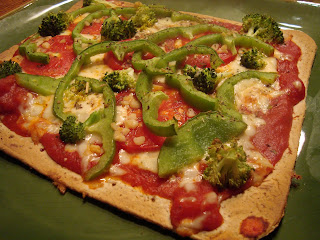
The quick fix? Whole wheat flatbreads topped with chunky marinara sauce, mozzarella, Gorgonzola, veggies, garlic, and a sprinkling of seasoning.

Tonight's repast may not be a culinary masterpiece, but it sure did hit the spot. And left me plenty of time scrub the baseboards and bake some muffins :)

What's your favorite meal to make when you're short on time?

Flatbread Pizzas
(A Hungry Spoon recipe)

This recipe speaks for itself--you're on easy street with quick n' simple preparation. The longest part of the process? Heating up the oven :)

Ingredients:
  • Whole wheat flat breads
  • Marinara sauce (or pesto)
  • Veggies of your choice, chopped (we used green bell pepper, onion, tomato, and spinach)
  • Cheese of your choice (we used Mozzarella, Gorgonzola, and Parmesan)
  • A few cloves of garlic, minced (if you're really time-crunched, just sprinkle some garlic powder on top!)
  • Italian seasoning
Directions:

1) Heat oven to 400 degrees.

2) Spoon marinara over each flatbread. Sprinkle cheese on top. Top with a big ol' mound of your chopped veggies. Sprinkle with garlic and Italian seasoning.

3) Place flatbreads on a greased cookie sheet and bake for minutes, or until heated through and cheese has melted. Serve with extra marinara for dipping.

4) Eat. Enjoy. Now move on to the next item on your to-do list!

Wednesday, September 29, 2010

Risotto: Worth the Wait

Last night I made risotto for the first time.
After the meal was cooked and dinner was eaten, I found myself asking two questions:

1) Why have I never made risotto before?

2) How many hours until I can eat it again for tomorrow's lunch?

Friends, I almost didn't wake up from the food coma this delicious risotto swept me into. The recipe, courtesy of Clean Eating Magazine, is surely a keeper. Adam even asked if we could make it in lieu of stuffing at Thanksgiving (While flattered, I respectfully declined. A girl just can't do without her favorite seasonal stuffing.).

I suppose what intimidated me about the risotto was the cooking process. You slowly add the broth over time, stirring constantly. Would I be patient enough? Could I handle the risotto-madness?

I didn't just handle it, friends. I owned it.

Another darling addition to this fall dish? Roasted butternut squash. Oh, yes. And don't forget about the toasted walnuts and freshly grated parmesan. Tastes like true autumn love to me.

A cautionary note: This is a dish that takes time, so forget your Rachael Ray speedy-pants. Just relax, take it easy, and know that your dinner is well worth the wait.

Is there a particular dish or food you've always wanted to try, but have been "afraid" to?

Butternut Squash Risotto
(recipe from Clean Eating Magazine)

This dish is delicious-ness to the extreme. I can't say anything else. I'm actually speechless.

Ingredients:
  • 1 butternut squash, peeled and diced
  • a little drizzle of olive oil
  • Salt and fresh ground black pepper
  • 4 cups low-sodium chicken broth
  • 1 onion, diced
  • 1 TBSP olive oil
  • 1 TBSP fresh garlic, minced
  • 1 cup arborio rice (risotto)
  • 1 TBSP fresh thyme leaves (I just used a sprinkling of dried)
  • 1 TBSP fresh sage, minced (again, I just used a sprinkling of dried)
  • 1/2 to 1 cup frozen peas
  • 1/4 cup shredded Parmesan cheese
  • 1/4 cup chopped walnuts, toasted
Directions:

1) Preheat oven to 425 degrees. Toss squash with a just a little bit of olive oil. Season with salt and pepper. Spread squash in an even layer on a rimmed baking sheet. Bake until tender, about 25 minutes, stirring every 10 minutes. Set squash aside.

2) Meanwhile, bring broth to a simmer in a saucepan over medium heat; keep warm.

3) In a pot, heat 1 TBSP olive oil over medium heat. Add onions and garlic and saute until softened, about 3 - 4 minutes. Add rice to the pot and stir to coat with oil and onion.

4) Add 1/2 cup warm broth; simmer and stir with a wooden spoon until the liquid evaporates, about 2 minutes. Stir in another 1/2 cup of warm broth; simmer, stirring occasionally until liquid is almost evaporated. Continue adding broth in 1/2 cup increments, adding more only after the previous addition has been absorbed. Rice is done when it's tender but still slightly firm and white in the center (not chalky!). Continue adding broth until only 1/2 cup remains.

5) Add thyme, sage, peas, and cheese to the pot with the last 1/2 cup of broth; stir until cheese melts. Remove pan from heat before all the liquid has absorbed. Gently fold in cooked squash and walnuts. Season risotto with salt and pepper.

Tuesday, September 28, 2010

Quesadillas: Autumn-ized

I love classic summer-style quesadillas: fresh grilled veggies, black beans, and bit of goat cheese or sharp cheddar. Simple, flavorful, and oh-so-seasonal.

But seasons change, and Fall is upon us. Summer days (and menus) are nothing but memories. We ended our fling with Summer last week, and it's time to move on, my friends. Summer "just isn't that into us."

Good thing Fall can't keep its hands off of us :)

In the spirit of oh-so-seasonal quesadillas, let's welcome an Autumn-ized twist on the this traditionally Mexican dinner delight: Apple and Brie Quesadillas with Honey Mustard, featured in this month's Cooking Light.

My interest in this recipe was instantly piqued by the use of Brie--a cheese I consider to be "fancy-schmancy," and reserved for special occasions only. My hungry stomach and craving for soft cheese is a special occasion, right?

Needless to say, I certainly enjoyed my special-occasion-Brie. It paired beautifully with the crisp, sauteed apples and light honey mustard sauce. Autumn-ized Quesadillas, indeed.

Summer is nothing but a distant memory...

Apple and Brie Quesadillas
(recipe adapted from Cooking Light)

If you don't have Brie on hand, you could experiment with other cheeses for sure! Also, if you're not up for making your own honey mustard, you can always cheat and buy some pre-made--Ken's "light" version is quite tasty.

Ingredients:
  • 3 cups thinly sliced apples
  • 1 onion, sliced
  • a little olive oil
  • Flour tortilla shells
  • 6 oz. Brie cheese
  • Salt and pepper to taste
  • Honey Mustard Sauce (recipe below, or store-bought if you prefer)
Honey Mustard Vinaigrette Ingredients:
(I apologize--I didn't measure one thing for this! I just combine the ingredients and adjust to taste. Trust your inner Foodie!)
  • White wine vinegar (probably a couple tablespoons?)
  • Dijon mustard (a couple teaspoons?)
  • Honey (a tablespoon?)
  • Apple Cider (4 teaspoons?)
  • Salt and pepper
Directions:

1) Heat olive oil in a large skillet over medium heat. Add apples and cook until tender-crisp (about 5 -8 minutes). Add onions and cook until softened--about 4-5 minutes. (I also added a little apple cider into the mix!). Season with salt and pepper. Remove from heat and set aside.

2) Spread one half of the tortilla with Honey Mustard. On the other half of the tortilla, place Brie cheese (the recipe says "sliced Brie," but I just spread mine!). Place approximately 1/2 to 2/3 cup apple and onion mixture on top of mustard-coated side of tortilla. Fold over other half.

3) Heat a little olive oil in a skillet over medium heat. Place tortilla in skillet and cook until lightly browned on the bottom, approximately 3 minutes. Flip and cook until other side is also lightly browned. Serve with additional honey-mustard for dipping.


Monday, September 27, 2010

Sell-Your-Soul Pumpkin Cookies


Yep, they're actually called "Sell-Your-Soul Pumpkin Cookies."

But then again, I wouldn't expect anything less from the superbly sassy and remarkably talented ladies of (you guessed it) Vegan Cookies Invade Your Cookie Jar.

In my circle of life, pumpkin cookies need no introduction. They're simply that good. With a velvety soft texture, spiced pumpkin flavor, and melt-in-your-mouth consistency, every bite is like a Fall Fest celebration in my mouth.

Did I mention there's brown sugar frosting, too? It's a pumpkin cookie requirement where I come from.

The authors let us in on the secret that makes these cookies sell-your-soul worthy: Heating the 1 cup of pumpkin on the stove-top, and cooking it until it has reduced to 1/2 cup. By eliminating the pumpkin's high water content, your cookies are left with a more cookie-like texture, similar to the density and chewy-ness of a classic chocolate chipper (as opposed to the fluffier, cake-like texture of the traditional pumpkin cookie).

Needless to say, my family was on the brink of a soul-selling yard sale at our weekly Sunday lunch yesterday. Fortunately, our souls are still intact, but these cookies will not be forgotten. I've definitely found my go-to recipe to quench the pumpkin cookie crave.

What's your favorite go-to cookie recipe?

Sell-Your-Soul Pumpkin Cookies

These pumpkin cookies are un-beatable. Truly. Just plan ahead--the first start is to cook the pumpkin down for 30 - 45 minutes. The rest of the recipe is quick n' simple...and the result will bring a Fall Fest party right to your mouth.

Ingredients:
Cookies
  • 1 cup canned pumpkin
  • 1/2 cup non-hydrogenated vegetable shortening
  • 1/2 cup sugar
  • 1/2 cup brown sugar
  • 1 tsp. vanilla extract
  • 1 1/2 cups all-purpose flour
  • 1/4 cup oats
  • 2 TBSP cornstarch
  • 1 1/2 teaspoons cinnamon
  • 1/2 tsp. ground ginger
  • 1/2 tsp. ground nutmeg
  • 1/2 tsp. baking powder
  • 1/2 tsp. salt
Frosting:
(old recipe from a reader of our local newspaper "The Dominion Post")
  • 3 TBSP butter or non-hydrogenated vegan margarine
  • 1/4 cup milk (regular or non-dairy)
  • 1/2 cup brown sugar
  • 1 cup + 2 TBSP sifted powdered sugar (I forgot to sift mine this time, and ended up with a few lumps)
  • 1/2 tsp. vanilla
Directions:

1) First, reduce the pumpkin. Place it in a saucepan over medium heat for 30 - 45 minutes. Keep the heat low enough that it doesn't boil, but it should appear to be steaming. Stir often! at 30 minutes, put the pumpkin in a liquid measuring cup to see how much it has reduced (you want it to reduce to 1/2 cup). If it's not yet down to 1/2 cup, return to the pot and cook until it has reduced to 1/2 cup. Set aside and cool.

2) Preheat oven to 350 degrees. Grease two cookie sheets.

3) In a large mixing bowl, cream the shortening and sugars together until light and fluffy. Beat in the cooled pumpkin and vanilla.

4) Sift in remaining ingredients and thoroughly combine. Spoon dough onto cookie sheets in rounded tablespoon-fuls, flattening the top slightly.

5) Bake for 10 -12 minutes. Remove cookies from oven, allow to cool for 5 minutes on the cookie sheet, and transfer to a wire rack to cool completely. Now, let's get ready to frost 'em.

6) To make the frosting: Combine the butter, milk, and brown sugar in a saucepan over medium heat. Boil slowly for 2 full minutes. Remove from heat and immediately add confectioner's sugar and vanilla. Beat until spreading consistency.
* Note: You've got to act fast with this frosting recipe! If you boil too long and the frosting becomes too think when you add the confectioner's sugar, just add a little milk until the right consistency is reached. Same goes for if it's too liquidy--just add a bit more confectioner's sugar until you get it the way you like it!

7) Frost those tasty pumpkin cookies! If you've got pumpkin seeds on hand, I would definitely sprinkle some on top (we were all out)

Saturday, September 25, 2010

Sloppy Sandwich Night

As a child, I recall Sloppy Joe lunches as one of the dreaded days in the school cafeteria: The orange and brown sandwich filling scooped onto a bun was always a bit too mysterious. Add a side of canned corn and fruit cocktail, and you've got yourself a "well-balanced meal?"

I shudder at the memories.

I never could have dreamed that one day Sloppy Joes would rank near the top of my "Favorite Sandwich List" as an adult. Well, "Barbeque Tempeh Sloppy Joes" to be exact. (And yes, I do have a Favorite Sandwich List. Hey--we all have our priorities in life.).

This sandwich makes me weak in the knees it's so good.

I mean it, friends. You may never go back to eating meat again after you try this baby. The from-scratch sweet n' tangy barbeque sauce is bursting with flavor (yes, bursting!). Add sauteed onions and green pepper, and a sprinkling of blue cheese and voila! A hearty bite of heaven on earth. (If you're a true cheese-head like my husband, you could also add a slice of Colby-Jack or Swiss cheese to your sandwich.).

If you've never tried tempeh, this is a great dish to give it a first try. It's loaded with protein and makes an awesome vege-head sandwich filler when your veggies and beans just aren't enough.

So, may my Saturday night dinner inspire your dinner tonight. Everyone needs a Sloppy Sandwich Night in their life.

What's your favorite "ultimate" sandwich?

Barbeque Tempeh Sloppy Joes
(Adapted from a recipe found in Robin Robertson's The Vegetarian Meat and Potatoes Cookbook)

This sandwich fulfills my craving for a hearty fork and knife sandwich. If you're interested in cooking vegetarian cuisine for a heavy meat-eater, Robertson's cookbook is a fantastic starting point--all of her recipes are stick-to-your-ribs good.

Ingredients:

Barbeque Tempeh:
  • 8 oz. of tempeh, cut into 1/4 inch wide strips
  • 2 TBSP olive oil
  • 1 onion, minced
  • 4 cloves of garlic, minced
  • 1 - 1/2 teaspoons fresh ginger, minced
  • 2 cans of drained crushed tomatoes ( 14.5 oz. each)
  • 1/4 cup molasses
  • 2 TBSP dijon mustard
  • 3 TBSP soy sauce
  • 1 TBSP rice vinegar
  • 1/4 tsp. ground red pepper
Onion n' Pepper
  • 1 large onion, sliced
  • 1 bell pepper, sliced
  • a little olive oil
Sandwich Fixins'
  • Bread or bun of choice (we just used our standard bread)
  • Blue cheese crumbles
  • Optional: sweet pickle slices (bread n' butter pickles)
Directions:

1) Heat olive oil in a large skillet over medium heat. Add tempeh slices, allowing to brown on one side (approximately 3 minutes). Flip, and brown tempeh on the other side. Remove tempeh from the skillet and chop into smaller pieces. Set aside.

2) In a pot, heat a little olive oil over medium heat. Add diced onion and saute until softened, about 5 minutes. Add garlic and ginger, and saute for another 2 minutes. Add remaining ingredients for the barbeque tempeh (through ground red pepper). Bring to a boil, reduce heat and simmer for 10 to 15 minutes, allowing to thicken. Stir occasionally. Add tempeh and allow sauce to cook another 5 minutes, until heated through. Your filling is done!

3) Heat a little olive oil in a skillet over medium heat, and add sliced onion and bell pepper. Saute until lightly browned, about


Cheesecake Bartering


How much is a homemade cheesecake worth to you?

Try one early-morning dog walk, and a very happy husband.

Allow me to back-track for a moment: We have a regular dog-walking schedule at our house--one of us walks the precious pooch in the morning, the other in the afternoon, and our scheduled days and times are fairly consistent.

Although Wednesday morning is one of my scheduled Dora-Days, I already had a craving on Tuesday night for an early-morning workout.

What a conundrum I've found myself in. Could I convince Adam to relinquish his extra 30 minutes of sleep?

I asked the man, point-blank, if I could engage in a little bartering with him. What could I give to get my early morning work-out? (Enter Dora, providing puppy-dog eyes and a sweet demeanor to strengthen my case)


As if he'd been waiting all year for me to ask, he answered without hesitation: Homemade Cheesecake.

Done. I couldn't believe it was that easy. (And looking back, I'm reflecting on the irony of baking a cheesecake so I can get in my work-out. Awesome.).

But I digress. Let's turn our attention back to what really matters: the cheesecake itself. I discovered a stellar "light" cheesecake recipe from Cooking Light, which would fool even the cheesiest cheesecake connoisseur into thinking it's the real deal. In fact, I believe so strongly in the wow-factor of this cheesecake, I'd enter her in a competition with Paula Deen's best not-so-light recipe. Seriously.

Because this recipe is plain and simple (no frills attached), you can dress her up with your favorite flavor-rich embellishments. Mine? A drizzle of raspberry jam or fresh strawberry sauce. Adam's? Nutella spread all over the top. Such a man-thing, isn't it? (full disclosure: I tried his Nutella-doused slice, and I cannot lie: it was very good.).

In addition to our individual toppings, I should note that I further fattened up this "light" recipe by sprinkling some white chocolate chips on top of the cheesecake when I removed it from the oven. Come on--if I'm going to bake a cheesecake, I might as well go all out!

I've rambled enough for today. This cheesecake will rock your socks right off.

How much is a cheesecake worth to you? :)

New York Cheesecake--A Light Version
(recipe from Cooking Light magazine, September 2010; the crust recipe is adapted from Taste of Home magazine)

Regular cheesecake doesn't hold a candle to this baby--I promise you you'll never know the difference. Be creative with your toppings...whatever floats your boat is worth trying :)

Ingredients:

Crust:
  • 1 - 1/4 cups crushed reduced fat vanilla wafers
  • 2 TBSP butter, melted
  • 1 tsp. sugar
Filling:
  • 1/4 cup all-purpose flour
  • 1/2 cup 1% low-fat cottage cheese
  • 3 (8 oz. each) blocks fat-free cream cheese, softened
  • 2 (8 oz. each) blocks 1/3-less fat cream cheese, softened
  • 1 - 3/4 cups sugar
  • 1 -1/2 teaspoons finely grated lemon rind
  • 2 TBSP fresh lemon juice
  • 1/2 tsp. vanilla extract
  • 3 large eggs
  • 3 large egg whites
  • Optional: White chocolate chips for sprinkling on top, or melting and drizzling :)
  • Optional: Fresh strawberries, raspberry jam, or other toppings of your crazy choosing
Directions:

1) Preheat oven to 350 degrees.

2) Prepare crust: Combine vanilla wafer crumbs, sugar, and melted butter. Press onto the bottom, and slightly up the side, of a 9" springform pan. Bake at 350 degrees for 8 minutes. Allow to cool on a wire rack.

3) Reduce oven temperature to 325 degrees.

4) To prepare filling: Place flour, cottage cheese, and one block of fat-free cream cheese in a large mixing bowl (or food processor). Beat very well, until smooth. Add remaining blocks of fat-free cream cheese, all of the 1/3 reduced fat cream cheese, the sugar, lemon rind, lemon juice, and vanilla. Beat (or process) until smooth. Add the eggs and egg whites and beat until blended.

5) Pour filling into crust and bake at 325 degrees for 65 minutes, until almost set (center will not be firm, but it will set as it chills). Cool on a wire rack and refrigerate overnight.

Thursday, September 23, 2010

African Pineapple Peanut Stew


What do you get when you combine crunchy natural peanut butter, crushed pineapple, and fresh kale?

You guessed it: more Moosewood genius.

I'll admit, I was skeptical at first. I like my pineapple in fruit salad. I like my kale cooked down with garlic, onions, and tomatoes. And nut butter? Okay, I do like nut butter in just about anything.

But combining these three diverse foods? I never would have guessed the result would be a mind-blowing stew that takes vegetarian yummy-ness to a new level. The sweetness of the pineapple complements the crunchy and slightly salty peanut butter beautifully, making a surprisingly splendid sauce for the kale. Serve this stew over your favorite grain--we used Basmati rice, but couscous (or even quinoa?) would work well, too.

This recipe hails from Moosewood Restaurant Cooks at Home--a cookbook which lends itself to simple and relatively quick healthy meals (Being known for moving at a tortoise's pace in the kitchen, "simple" is undoubtedly what I need.). Added bonus: This cookbook highlights a variety of cuisines from all around the world. From Asian to African, Caribbean to Spanish, it seems no region of the world is left unnoticed.

Did I forget to mention the best part of this dinner?

White Chocolate Lemon Cheesecake for dessert. But I'll save that recipe for this
weekend :)

What's the strangest, yet delicious, food combination you've eaten?

African Pineapple Peanut Stew

This recipe is both inexpensive and super simple. And come on: who can resist natural peanut butter in their stew?

Ingredients:
  • 1 cup chopped onions
  • 4 garlic cloves, minced
  • 1 TBSP olive oil
  • One bunch of kale (4 cups chopped)
  • 2 cups of undrained (and unsweetened) canned, crushed pineapple (one 20 oz. can)
  • 1/2 cup natural peanut butter
  • 1/2 cup chopped fresh cilantro
  • salt and pepper to taste
  • Toppings: coarsely chopped peanuts and chopped scallions
Directions:

1) In a saucepan, saute the onions and garlic in the oil over medium heat for 10 minutes, stirring frequently until the onions are lightly browned.

2) While the onion cooks, wash the kale, remove the stems, and stack the leaves on a cutting board. Chop the kale well (ours came to about 1 inch slices)

3) Add the pineapple and its juices to the onions and bring to a simmer. Stir in the kale, cover, and simmer for about 5 minutes, stirring occasionally until the kale is just tender. Mix in the peanut butter and cilantro and simmer for 5 more minutes. Add salt and pepper to taste.

4) Holy Moly, that's a tasty dinner :)

Wednesday, September 22, 2010

Pumpkin Head, Pumpkin Bread

I’ve been waiting patiently (or, not-so-patiently) the entire month of September for pumpkin to arrive in Morgantown grocery stores.


Living pumpkin-less for the better part of this month, I’ve resorted to ogling the tempting images of mouth-watering pumpkin treats posted by fellow food bloggers--pumpkin breakfast oats, pumpkin chocolate energy bars, pumpkin cookies...and the list goes on.


But alas! Sunday, in a last-ditch effort to complete my pumpkin hunt at the 4th grocery store of the weekend, we found a small, picked over shelf of Libby’s pumpkin. A tiny, pitiful sign accompanied the shelf, noting “Pumpkin: Limited Quantity.” No kidding.


Needless to say we purchased 4 of the jumbo cans. I left two on the shelf for the next desperate baker to snatch up.


I wasted no time putting my pumpkin to good use. First on the recipe list? Healthy, hearty, and oh-so-nutty pumpkin bread.


My favorite almost-fat-free pumpkin bread recipe comes from Susan at Fat Free Vegan Kitchen. While the bread would be virtually fat-free, I prefer to add a heavy dose of chopped walnuts to the batter, eliminating the “fat free” part, but (in my opinion), enhancing the healthiness factor with those awesome omega-3s. As a side note, I also reduced the sugar in Susan's recipe by 1/2 cup.


Thus, the Great Pumpkin Crave of September 2010 has calmed; the appetite has been satisfied.


And with an added piece of pumpkin goodness to my morning eats, it looks like my breakfast just got a little bigger :)


Pumpkin Bread (the healthy version)

(adapted from Susan's recipe for Oil-Free Pumpkin Bread at Fat Free Vegan Kitchen)


This is a tasty, low-fat recipe that satisfies my pumpkin craving at breakfast like no other.


Ingredients:

  • 1 cup sugar (Susan's recipe calls for 1 -1/2 cups, if you prefer a sweeter bread)
  • 1 cup canned pumpkin
  • 1/2 cup applesauce
  • 1/2 cup water
  • Egg substitute equivalent to 2 eggs (I just used 2 eggs!)
  • 1 - 2/3 cups flour (I used a mixture of whole wheat flour with unbleached all-purpose flour)
  • 1 tsp. baking soda
  • 1 tsp. cinnamon
  • 3/4 tsp. salt
  • 1/2 tsp. baking powder
  • 1/2 tsp. nutmeg
  • sprinkling of pumpkin pie spice
  • some orange zest (I didn't measure! Just mixed a little zest from a fresh orange right in!)
  • 1/3 cup chopped walnuts
  • 1/4 to 1/3 cup dried cranberries

Directions:


1) Preheat oven to 350 degrees and coat a 9 x 5 inch loaf pan with cooking spray.


2) Beat the first 5 ingredients in a large mixing bowl. In another bowl, combine all dry ingredients (except the walnuts and cranberries). Gradually mix dry ingredients into wet ingredients. Fold in walnuts, cranberries, and orange zest.


3) Bake for 60 - 70 minutes, or until toothpick inserted comes out clean (mine loaf was finished in 65 minutes).


Tuesday, September 21, 2010

Bean-Lovin' Woman


Beans, beans
The magical fruit
The more you eat, the more you....

LOVE THEM!

It's true: I'm a bean-loving woman. No apologies.

Roasted chickpeas? You bet.
Black bean quesadillas? Perfection.
Garlicky White Bean Dip? Oh, yes.

Tonight's dinner? A classic, perfectly-seasoned Vegetarian Black Bean Chili, recipe courtesy of (you guessed it!) the Moosewood Collective.

When it comes to chili, I rarely follow a recipe. Instead, you'll find me dumping every chopped vegetable and available bean in a pot, sprinkling in spices in unknown amounts, and "seasoning to taste" until I'm ready to eat.

Adam, however, prefers a little more guidance in his chili-creating, and since he was the head chef tonight (score!), he went with a by-the-book Moosewood recipe. No complaints here.

I found myself in bean n' veggie heaven after the first spoonful.

I have to admit, this is the perfect recipe to get you in the mood for fall (Sweaters, anyone? Did I hear pumpkin-carving?). Added bonus: the awesome healthiness factor! After you make a full pot, you've got a week's worth of healthy lunches.

We enjoyed our chili with leftover Herb n' Cheese Moosewood muffins. If you're feeling a little crazy, go ahead and top your bowl of bean-lovin' goodness with some shredded cheddar cheese and chopped avocado.


What recipe gets you in the mood for fall?


Festive Black Bean Chili

This recipe truly needs no tweaking--I think they've definitely got it right! However, there's always room for adaptation, so make any changes needed to fit what's in your fridge (or your most current craving). Avocado makes the perfect topping :)

Ingredients:
  • 2 cups chopped onion
  • 4 garlic cloves, minced
  • 1/2 cup water (or veggie broth)
  • 1 TBSP ground cumin
  • 1 TBSP ground coriander
  • 1 cup salsa
  • 2 green and/or red bell peppers, chopped
  • 3 cups cooked black beans (two 15 oz. cans, drained and rinsed)
  • One 28 oz. can of whole or diced tomatoes, with the juice
  • 2 cups fresh or frozen corn kernels
  • salt and pepper to taste
  • Tabasco or hot sauce to taste (not for me!)
  • Optional assorted toppings: fresh cilantro, chopped avocado, shredded cheese, etc.
Directions:

1) In a soup pot, cook onions, garlic, and water or broth on high heat, stirring constantly, for about 5 minutes. Add the cumin and coriander, and stir on high heat for one minute. Stir in the salsa and bell peppers, lower the heat, cover, and simmer for about 5 minutes, stirring occasionally. Add the beans and tomatoes, simmer for 10 minutes. Add the corn and continue to cook for 10 minutes. Season with salt and pepper. Top individual servings with toppings, if desired. (we just stuck with the cilantro tonight)

2) Enjoy your bean-tastic dinner!

Monday, September 20, 2010

The Moose is Always Right


Well, the Moosewood is always right.

I do believe the Moosewood Collective compiles some of the most creative, classic, and fantastic vegetarian recipes out there. Unfortunately, their cookbooks have been collecting a little dust on my shelf for the past few months, and they've been feeling a bit neglected. As such, I decided to salute the Moosewood Collective this week with a week's worth of dinners from their cookbooks. Neglected no more!

Tonight's recipe, "Quinoa Pine Nut Pilaf," comes from my favorite of their cookbooks: "Moosewood Restaurant Low-Fat Favorites." This was my first purchase amongst their cookbooks (a solid 3 years ago), and it boasts over 300 recipes for unique and healthy breads, soups, sandwiches, pastas, entrees, desserts, and much more. Needless to say, the pages are covered with smudges, stains, and other evidence of my somewhat messy cooking skills. If you're looking for a starter Moosewood with especially healthy options, try this baby first :)

As for tonight's recipe, who doesn't love quinoa? With pine nuts? And veggies? Holy yum. We served ours with Herb and Cheese Muffins (recipe, of course, also hailing from the Moosewood).

Geez. I'm starting to sound like a sales-woman.

Rock on, Moosewood. I promise to keep you at the front of the cookbook stack from now on.
What's your favorite cookbook right now?

Quinoa Pine Nut Pilaf
(adapted from a recipe found in the Moosewood Restaurant's Low-Fat Favorites)

This recipe is just fine and dandy on its own, but if you require some sort of vinaigrette on your grain salads, try a simple mix of red wine vinegar, olive oil, honey, and a pinch of salt, pepper, and garlic powder.
Ingredients:
  • 1 large onion
  • 4 cloves garlic, minced
  • 1 TBSP olive oil
  • 1 yellow or red bell pepper, diced
  • 1 green bell pepper, diced
  • 2 tsp. ground cumin
  • 2 tsp. ground coriander
  • 1 cup quinoa (we used red quinoa tonight)
  • 1 - 2/3 cup broth (veggie or chicken)
  • 1/2 cup chopped fresh basil
  • 1 - 1/2 cups fresh or frozen corn kernels
  • 1 cup frozen edamame
  • salt and pepper to taste
  • 1/4 cup toasted pine nuts
Directions:
1) In a heavy saucepan, saute the onions and garlic in the oil over medium heat until softened (about 4 -5 minutes). Add the bell peppers, cumin, and coriander, and saute for an additional 5 minutes until softened. Add the quinoa and broth to the saucepan, cover tightly, reduce heat, and simmer gently for about 15 minutes. Stir in basil, corn, and edamame, and cook 5 to 10 minutes longer, or until quinoa is tender and liquid is mostly absorbed.

2) Add salt and pepper to taste. Stir in pine nuts.

Sunday, September 19, 2010

Chocolate Peanut Butter Pillows

At first glance, you see a basic chocolate cookie. Simple, chocolatey, no frills. What you see is what you get, right?

Wrong! You take a bite out of said "simple chocolate cookie," and inside you find a big ball of peanut buttery goodness. The kind of peanut buttery goodness that reminds you of a Reese's Peanut Butter Halloween pumpkin. But the cookie you hold is so much better, given its vegan nature and all-natural peanut butter core (That means it's healthy, right? Yep, definitely healthy.).

Friends, when it comes to dessert, few food combinations make my heart melt as much as peanut butter + chocolate. After locating the ultimate peanut butter blondie recipe earlier this summer, I was certain I had reached peanut butter + chocolate nirvana. However, I'm pleased to say that my blondies have met a life partner and soulmate in these Chocolate Peanut Butter Pillows.

Did you say pillows? Oh yes I did. Anyone else willing to take a nap on one of these babies? I have no doubt I'd wake up with a stiff neck, a missing pillow, and chocolate crumbs around my mouth. So worth it though :)

My only word of caution with this recipe is to monitor the stickiness of the chocolate dough, and adjust accordingly. I learned the hard way (with chocolate dough-covered hands) that this dough must be firm enough and cold enough to work with! I added a little extra cocoa powder and flour to what the recipe called for to reduce the dough's stickiness. I also made one small batch, and then stuck the dough in the freezer 20 minutes before making the second batch. Again: it was all worth it in the end.

Move over Reese's. Vegan Cookies Invade Your Cookie Jar is in town. And boy do they mean business.

Chocolate Peanut Butter Pillows (vegan)

These little wonders remind me of the cookie version of the chocolate-dipped peanut butter balls we make for the holidays. Remember to keep the chocolate dough cold and keep your hands covered in flour when molding the dough.

Ingredients:

Chocolate Dough:
  • 1/2 cup canola oil
  • 1 cup sugar
  • 1/4 cup pure maple syrup
  • 3 TBSP milk
  • 1/2 tsp. vanilla extract
  • 1 2/3 cups all-purpose flour
  • 1/3 cup plus 3 TBSP cocoa powder
  • 1/2 tsp. baking soda
  • 1/4 tsp. salt
Peanut Butter Filling:
  • 3/4 cup all-natural, salted peanut butter (if your peanut butter is un-salted, add 1/4 tsp. salt to the dough)
  • 2/3 cup powdered sugar
  • 2 - 3 TBSP milk
  • 1/4 tsp. vanilla extract
Directions:

1) In a large mixing bowl, combine oil, sugar, maple syrup, milk, and vanilla. Mix until smooth. Sift in flour, cocoa powder, baking soda, and salt. Mix to form a moist dough. Refrigerate for at least 2 hours (or, I accelerated the process by placing in the freezer for about a half hour to 45 minutes. However you choose, just make sure you keep the dough cold!).

2) Make the peanut butter filling: In another mixing bowl, use a mixer to beat together the peanut butter, powdered sugar, 2 TBSP milk, and vanilla to form a moist but firm dough. If peanut butter dough is too dry and crumbly, add in the additional tablespoon of milk. If dough is too wet, knead in some extra powdered sugar.

3) Preheat oven to 350 degrees and coat two cookie sheets with cooking spray.

4) Roll peanut butter dough into 24 balls. Coat hands with flour and scoop a generous tablespoon of chocolate dough. Flatten dough into a disc in your hand and place a peanut butter ball in the center. Wrap chocolate dough around peanut butter and roll into a smooth ball in your hands. Place on cookie sheet and repeat with remaining dough. Remember: keep the chocolate dough cold (you may have to work in shifts). If desired, you can oh-so-gently press on the top of each cookie a little to flatten it just a bit, but it's not necessary. Space dough balls 2 inches apart on cookie sheet.

5) Bake for 10 minutes. Remove from oven and allow to stand for 5 minutes before placing on a cooling rack to cool completely.


Saturday, September 18, 2010

Saturday Morning Routine


Saturday mornings are insanely predictable around here.

And I love every minute of it.

1) Early morning run? Check.
2) Husband making pancakes? Absolutely.
3) Cookbooks spread out on breakfast table? Ready and waiting.

What can I say? I'm a creature of habit.

We started this little routine when we got married, and it didn't take long for me to realize that Adam's Saturday morning pancakes (or waffles) would be one of the highlights of the weekend. When it comes to breakfast goods, the man knows what I love: heavy on the "fillers," with an inordinate amount of fresh fruit and nuts mixed right into the batter.

While the summer brought several weeks of berry and banana pancake variations, today marked a seasonal turning point for the weekend breakfast menu: Apple-Cinnamon Pancakes with Chunky Apple Walnut Sauce. (Honestly? We're still working on that bushel of apples we inherited 3 weeks ago).

These p-cakes hit the spot, friends. They were the perfect start to a fall weekend, and a wonderful accompaniment to our weekly recipe/menu-planning session. (Menu-planning session? Really? My nerdy qualities are so blatant, there's just no hiding them.)

While we served our flapjacks with some chunky apple n' nut sauce, I could see natural nut butter being an awesome topping as well. I think I see an afternoon snack in my future....

Happy Saturday :)

What's your favorite weekend routine?

Apple Cinnamon Pancakes with Chunky Apple-Walnut Sauce
(Pancake recipe adapted from Nava Atlas' The Vegetarian Family Cookbook)

We add (what some might consider) a ridiculous amount of fruit to our pancakes, making them more heavy and dense than your traditional flapjack. Feel free to adjust the amounts to suit your liking.

Ingredients:
  • 1 - 1/3 cups all-purpose, unbleached flour (or a combination of all-purpose and whole wheat; we used 1 cup all-purpose and 1/3 cup whole wheat)
  • 1 teaspoon baking powder
  • 2/3 tsp. baking soda
  • 2 tsp. ground flaxseeds
  • 1 cup non-fat vanilla yogurt
  • 3/4 cup skim milk (or sub in soy or almond milk)
  • 3/4 tsp. cinnamon (approximately)
  • Sprinkling of nutmeg
  • Small splash of vanilla
  • 2 cups chopped apples
  • Optional: toasted, chopped walnuts (we left them out today since we loaded chopped walnuts into the sauce).
Directions:

1) Combine the dry ingredients in a large bowl. Gently fold in yogurt and milk. Add in seasonings and stir until just combined. Gently fold in apples (and nuts, if using).

2) Heat a non-stick griddle that has been coated with cooking spray (and/or butter if you prefer) to medium heat. Pour batter onto griddle in 1/3 cup-fuls. Allow to cook until lightly browned, then flip to cook other side until lightly browned (approximately 4 minutes per side).

3) Top with Chunky Apple Walnut Sauce (recipe below), or nut butter, or your own awesome creation.

Chunky Apple-Walnut Sauce

Ingredients:
  • 2 cups chopped apple
  • 1/2 to 1 cup of unsweetened applesauce (depending on how much "sauce" you want in there)
  • 3 - 4 TBSP water
  • 1/2 tsp. cinnamon
  • 2 - 3 TBSP brown sugar
  • 1/4 cup chopped, toasted walnuts
Directions:

1) In a saucepan, combine apples, applesauce, water, cinnamon, and brown sugar. Heat on medium heat until bubbly (about 4 -5 minutes). Reduce heat to low, cover, and simmer until apples are tender. Season to taste.

2) Top your p-cakes with this apple-licious sauce :)


Thursday, September 16, 2010

Dishwashing and Dinner Salads

Tonight I got to be dishwashing royalty.


Okay, maybe I over-glorified my role just a tad.


Regardless, I had an awesome time suds-ing up the dishes at the Taste of Home Cooking School event that premiered in Morgantown tonight.


Where did I get such a sweet gig, you ask? My mom is undoubtedly the #1 Fan of Taste of Home’s Simple and Delicious Magazine. So, when the local food panel I sit on was asked to volunteer backstage at Taste of Home’s event, I jumped at the chance to bring mom along for some behind-the-scenes fun.


And fun we had.


They cooked up a storm at the event, and raffled off every dish they created for audience members to take home (backstage volunteers excluded unfortunately!). This event was not for the faint-of-heart: For instance, "Upside Down Banana Pecan French Toast" was first on the menu, complete with 2 cups of half and half (even my eyes widened at this one!).


Prior to all the dish-washing mania though, I chowed down on a dinner salad that I knew would power me through the next three hours on my feet, elbow-deep in Palmolive.


This baby was loaded with plenty of stick-to-your ribs fixins.' Let’s be honest: there’s really no other way to eat a dinner salad.


This dish-washing chick is exhausted. Fortunately it's dress-down Friday at work tomorrow.... If only dress-down day meant sweatpants and a hoodie :)


Stick-To-Your-Ribs Dinner Salad

(a very simple Hungry Spoon original)


This salad was quick and easy to throw together, and filled me up with all kinds of happiness. I don't have amounts for anything, because I just threw it all into the mix!


Ingredients:

  • Fresh spinach, stemmed and chopped
  • chopped avocado
  • Chickpeas, rinsed and drained
  • chopped broccoli
  • chopped fresh tomato
  • toasted pumpkin seeds
  • Gorgonzola cheese
  • Roasted garlic hummus
  • Black bean salsa
  • A little drizzle of balsamic vinaigrette
Directions:

1) Combine all ingredients in a big bowl, mix together, and enjoy your crunchy, satisfying dinner.

2) Enjoy your Friday!