Sunday, January 30, 2011

NFL Sandwich


Yesterday, Adam did the impossible.

The man created vegetarian "meat"ball subs. We're talking the REAL deal. Homemade hoagie buns, fresh marinara sauce, a healthy dose of bean-ball action, and a sprinkling of Mozzarella. Basically, it was an NFL-Football-Player-Turned-Vegetarian kind of sandwich.

And after waking up from my food coma, all googly-eyed and giddy, I knew I had to share this brilliant blip on the culinary radar with you.

I know what you're thinking: I'm a walking contradiction. I'm a vegetarian...creating and eating a mock-up of a meatball sub. Ah, but I subscribe to the vege-head lifestyle for many reasons...none of which include a loss of cravings for sloppy, gooey, NFL-gameday-type sandwiches that cause my heart to skip a beat.

Perhaps the best part of this sandwich was the homemade bread. As you know, Adam is quite the bread-making man in our house. While his weekly loaves may come out of the bread machine, today he kneaded and pounded his way by hand to fresh whole wheat hoagie buns. Holy moly, were they ever perfect! My bread expectations have definitely gone up a notch.

With that being said, go make yourself a honkin' big sandwich for dinner tonight. Personally, I recommend this one.

Vege-Head Bean-Ball Subs
(drawing on recipes from Veganomicon and Veggie Burgers Every Which Way)

Ingredients:
  • 1 recipe for Bean-Balls
  • Marinara sauce of your choice
  • Shredded Mozzarella
  • Hoagie buns (recipe below)
Hoagie Bun Ingredients:
  • 1 cup warm water
  • 3 TBSP warm milk
  • 2 TBSP molasses
  • 1 TBSP sugar
  • 2 - 1/4 tsp. active dry yeast
  • 1 egg, beaten
  • 1 - 1/2 to 2- 1/2 cups bread flour
  • 1 - 1/4 cups whole-wheat flour
  • 4 tsp. salt
  • 2 TBSP olive oil
  • Eggwash (1 beaten egg plus 1 TBSP milk)
  • Sesame seeds for topping
Directions for Hoagie Buns:

1) Whisk the warm water, milk, molasses, and sugar in a small bowl. Whisk in the yeast and allow to stand for about 5 minutes, until yeast begins to foam. In a separate large bowl, mix together 1 cup of the bread flour, all of the whole wheat flour, and the salt. Add the yeast mixture, oil, and egg.

2) Stir with a wooden spoon until well-combined, adding more flour as needed until it shapes into a ball. On a floured surface knead the dough until it's smooth--about 10 minutes--adding more flour as needed. Shape the dough into a ball.

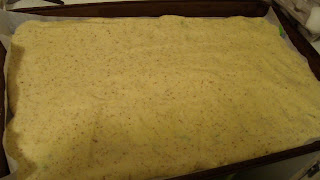
3) Drizzle a little olive oil into the mixing bowl, place the dough in it and turn to coat. Cover the bowl with plastic wrap and allow it to sit in a warm place until doubled in size--about 1 - 2 hours.

4) After it has risen, separate the dough into 6 balls. Place them a few inches apart on a parchment-lined baking sheet. Cover with a towel and allow to rise in a warm place for 1 - 2 hours until doubled in size.

5) Preheat the oven to 400 degrees. Brush the buns with the eggwash and sprinkle with sesame seeds for garnish. Bake for about 16 - 18 minutes, rotating the pan halfway through the baking time.

Assemble Your Sandwich:
Split open a big, beautiful hoagie bun. Stuff with bean-balls, warmed marinara, and top with shredded Mozzarella. Grab a fork and a knife, and dig in.

Saturday, January 29, 2011

The Savory-to-Sweet Switch

Converting a savory food to a sweeter variation is something my brain has a hard time with.

For example, onions have no place in a dessert.

Marshmallows do not belong in a dinner salad.

And for heavens' sake, please keep the chocolate off my pizza.

For these reasons, among many others, I was skeptical of dessert hummus. You want me to add sugar to my....beans?

Friends, after making a batch of dessert hummus earlier this week, I now recognize myself as its #1 fan. Seriously. I gobbled up a bowl-ful of this sweet, beany dip with a sliced apple and a bowl of banana soft serve for my Thursday night dinner. It was truly like eating dessert for dinner.

The creator of dessert hummus--Evan Thomas--suggests using it as a dip for graham crackers, fruit, animal crackers, or a sandwich spread.

Or, you can simply eat it by the spoon-ful (which I may or may not have been doing at my desk at work this week. What can I say? This girl needs bean-powered fuel to get through the day).

I'm now a savory-to-sweet believer. Just don't ask me to pour hot fudge on my garlic bread.

Cinnamon Dessert Hummus
(recipe adapted from The Wannabe Chef)

The original recipe calls for 1/4 cup pure maple syrup. I eliminated most of this because, well, I did make my dessert hummus for dinner. But by all means, if you don't mind the sweetness and you're looking for a truly desssert-y dip, go all out with the maple syrup!

Ingredients:
  • 2 cups butter beans
  • 1/4 cup almond butter
  • 2 TBSP brown sugar
  • a drizzle of pure maple syrup (the recipe called for 1/4 cup, but I used far less)
  • 1 - 1/4 tsp. cinnamon
  • For dipping: apple slices, banana soft serve, graham crackers, and a big ol' hungry spoon
Directions:
Process ingredients in a food processor until desired taste and consistency have been reached. Go crazy with your dipping items :)


Thursday, January 27, 2011

Why I'm Not a Pastry Chef

Please don't hold the following picture against me:

No, it's not a second grade art project. Nor is it a practical joke at a clown's birthday party.

Nope. This odd-looking treat is my attempt at this month's Daring Bakers Challenge.

It's a good thing that I love my job, because the results of this project are a fantastic reminder that I was meant to be a social worker...and not a pastry chef.

The January 2011 Daring Bakers' challenge was hosted by Astheroshe of the blog Accro. She chose to challenge everyone to make a Biscuit Joconde Imprime to wrap around an Entremets dessert.

Basically, the dessert is comprised of a sponge cake--with colored patterns baked into it--that serves as a wrapper for a dessert filling. The filling could be layers of custard, pastry cream, pudding, cheesecake filling, etc.

I can't lie: This challenge scared me a little from the get-go. I had never heard of this dessert before, and I also seemed incapable of pronouncing its name. I'd never made a pastry cream, let alone a "cake wrapper." Basically, I was a ticking time-bomb with this recipe, and it's no wonder I completed the challenge without a spontaneous explosion of custard in my kitchen.

Still, I had a great, messy time tackling this French dessert and, despite my epic flop, I enjoyed the wild ride. Plus, it still tasted delicious, which is always a bonus.

The filling for my dessert was a rich chocolate pudding (made only of melted chocolate and tofu), layered with crushed Oreos and an Oreo crust. The color designs in my jocande sponge were supposed to be purple and green, but they darkened a bit too quickly in the oven.

I definitely recommend this dessert if you're looking for a fun Saturday afternoon project, and you have lots of patience and precision in your baking. Below I've spared you a lengthy recipe in favor of a brief photo depiction of the steps you take to make this dessert.

Have you ever attempted a Joconde Imprime dessert? Share details, please!

Joconde Imprime and Entremets Dessert
(check out Martha Stewart's recipe for a good intro to this French treat)

Super-Simplified 5-Step Directions:

1) Make Patterned Joconde Paste:
  • The decor paste is similar to a frosting in consistency, and food coloring can be used to achieve the colors you want for your joconde.
  • Place your paste in a ziploc bag and cut off the tip. Then, create your own patterns on a large piece of parchment paper. Place the parchment paper on a large cookie sheet and freeze until hardened (about 20 - 30 minutes).
2) Make the Joconde Sponge Cake:
  • While the paste is freezing, prepare the sponge cake batter, and preheat the oven to 475 (yes! It's VERY hot!).
3) Cake Goes in the oven:
  • Remove the patterned paste from the freezer. Pour the cake batter over the pattern and spread evenly to coat. Bake for 8 - 10 minutes, or until cake is cooked through (don't over-bake!).
4) Prep the cake for wrapping:
  • Flip the cake onto a piece of parchment covered with powdered sugar. Slice into strips of the appropriate size to fit your mold.
5) Set up the wrapper; pour in the filling
  • Line the sides of springform pan with parchment paper. Make a crust to fill the bottom of the pan (I made an Oreo crust). Place the sliced cake wrapper around the edges of the pan, patterned side out. Layer your filling inside (I layered the tofu-chocolate pudding with crushed Oreos). Remove outer edge of springform pan; refrigerate dessert.
It may not look too pretty, but it sure is mighty tasty :)

Wednesday, January 26, 2011

Baked Cauliflower Dijon Patties


As you may have observed in the recipe photo to the left, today I'm dealing with one of the major foes of a food blogger: The Brown n' Beige Blahs.

You know the usual culprits: corn, potatoes, rice, bread. Try as they might, they're just not Cover Girl material. Food bloggers prefer the Heidi Klum's of the culinary world: bright green cilantro, vibrant red bell peppers, and juicy purple blackberries.

Today's recipe is freak-tastically good. It's finger-lickin' tasty. It's literally erupting with flavor. But let's face it, friends: These patties have a face that only a mother could love.

We're talking Baked Cauliflower Dijon Patties. Holy delicious-ness! We served ours on top of a bed of lettuce, smothered with sauteed onions, bell pepper, and garlic, and topped with chopped avocado.

Adam adapted these baked cauliflower delights from a recipe in Lukas Volger's Veggie Burgers Every Which Way. You MUST buy this cookbook. It's loaded with over 150 pages of meat-less burgers and (of course) burger condiments. We're hoping to cook our way through the entire book.

Lesson learned today: Don't judge a book by it's cover. You never know when your Beige n' Brown Blahs will turn into Cover Model material.

Baked Cauliflower Dijon Patties
(adapted from a recipe in Veggie Burgers Every Which Way by Lukas Volger)

You can't tell in the picture below, but there IS a Cauliflower Patty buried under that pile of veggies. While I LOVED the Parmesan crumb topping on these patties, you could easily vegan-ize the recipe by eliminating the cheese. If you're feeling daring though, go ahead and mix some Parmesan right into the burgers. A little more cheese never hurt anyone :)

Ingredients:
  • head of cauliflower, cut into large florets
  • 3 TBSP Dijon mustard
  • 2 TBSP cornstarch
  • 1 egg
  • 1 TBSP lemon juice
  • 2 - 3 TBSP dried parsley (use fresh if you have it; we just didn't have any on hand)
  • 4 cloves garlic, minced
  • Freshly ground black pepper
  • 1 tsp. salt, divided
  • 1 cup seasoned bread crumbs, divided
  • 1/4 cup Parmesan cheese
  • For topping: sauteed onions and bell pepper, spinach/lettuce, and chopped avocado
Directions:
1) Preheat oven to 350 degrees and line a baking sheet with parchment paper.

2) Over a saucepan of simmering water, steam the cauliflower for 8 - 10 minutes, or until very tender (easily pierced with a fork).

3) In a food processor, puree 2/3 of the cauliflower mixture with the mustard, cornstarch, egg, and lemon juice. Transfer to a large bowl. Chop the remaining cauliflower into small pieces and add to the processed mixture. Stir in parsley, pepper, 1/2 tsp. salt, and 1/2 cup bread crumbs. Shape into 6 patties.

4) Combine the remaining 1/2 cup bread crumbs, 1/2 tsp. salt, and Parmesan on a plate. Dredge the patties in the crumb mixture until they are fully coated on both sides. Place on prepared baking sheet and bake for 20 - 25 minutes, flipping halfway through, until burgers are nicely browned.

5) Serve on top of a bed of lettuce or spinach, topped with sauteed onions and bell peppers, and diced avocado.

Tuesday, January 25, 2011

Cup-Caking is a Verb


Ever since receiving Vegan Cupcakes Take Over the World earlier this month, I've basically been a cup o' cake maniac.

Our neighbors look hungry for cupcakes, don't they?

Adam's lab-mates really like lemon desserts. Maybe I should make them some cupcakes?

We don't celebrate trash day enough. Bring on the cupcakes!

And finally, the best and most ultimate excuse to bake these pint-sized desserts: a baby shower.

Baby showers are filled with pastel colors, lots of booties, and plenty of cheesy games. It's high time we add cupcakes into the mix. And since I'm planning a March baby shower for my pal Liz, I made an executive decision to feature a cupcake buffet at this baby-lovin' event.

This means I'll have to do some dreaded prep-work: you know, recipe-testing, baking, and tasting lots of cupcakes. It's such a hard life, isn't it?

I used the basics from my new cupcake bible to create a Pumpkin-Pecan Cupcake with Cinnamon Cream Cheese Frosting this weekend. Results were overwhelmingly positive, including a unanimous "yes" to be included in the March cupcake buffet.

So let's get cup-caking my friends. Because if "cup-caking" wasn't a verb before, it most certainly is now.

Pumpkin-Pecan Cupcakes with Cinnamon Cream Cheese Frosting
(inspired by the lovely ladies of Vegan Cupcakes Take Over the World)

These cupcakes are so moist and tender, and cinnamon cream cheese frosting is simply essential. This miniature dessert would make the perfect addition to your fall party spread...or a March baby shower :)

Ingredients:
  • 1 cup canned pumpkin
  • 1/4 cup canola oil
  • 2 TBSP nonfat vanilla yogurt
  • 3/4 cup sugar
  • 1/4 cup milk (I used skim)
  • 1 - 1/2 tsp. vanilla extract
  • 1 - 1/4 cups all-purpose flour
  • 1/2 tsp. baking soda
  • 1/2 tsp. baking powder
  • 1 tsp. cinnamon
  • 1/4 tsp. nutmeg
  • 1/4 tsp. salt
  • 1/2 cup finely chopped pecans
  • Extra pecan halves for garnish
Cinnamon Cream Cheese Frosting:
  • 1/3 cup butter
  • 1/3 cup cream cheese (I used 1/3 reduced fat cream cheese)
  • 3 cups confectioner's sugar
  • 1 tsp. cinnamon
  • 1 tsp. vanilla extract
  • 1 - 2 TBSP milk, if needed
Directions:

1) Preheat oven to 350 degrees and line a 12-cup muffin tin with cupcake liners.

2) In a large bowl, stir together the pumpkin, oil, yogurt sugar, milk, and vanilla. Stir in the dry ingredients with a spoon until well-combined. Fold in chopped pecans.

3) Fill cupcake liners two thirds full and bake for 22 - 25 minutes, or until toothpick inserted in the center comes out clean. Cool on a wire rack completely before frosting.

4) To prepare frosting: Beat the butter cream cheese together. Add the vanilla and cinnamon. Beat in the confectioner's sugar in 1/2 cup increments. Add milk and/or more sugar to reach desired consistency. Frost cupcakes, and top each with a pecan half.

Monday, January 24, 2011

Mexican Lasagna

I think it's humanly impossible to leave your parents' house without food. Sometimes I feel like my mom is literally throwing it at me as I walk out the door.

"Wait! Take one more slice of pie!"

"There's so much garlic bread! We'll never finish it alone."

"Let me package up some Greek salad for you. You did like it, didn't you? THEN TAKE SOME!"

And while I once thought it was just one of my mom's idiosyncrasies, I've found that Adam's mom is in on this game, too. So much so that his parents actually purchased a cooler for us to haul food in when we come to visit (including homemade eggnog during the holidays).

These people mean business.

And let's be clear about something: I'm not even close to complaining about it. I love it. I look forward to it. And I take full advantage of it :)

This week I benefited from the Parent-Child-Food-Gifting Phenomenon in the form of Mexican Lasagna. This deliciously loaded casserole is exactly what you might expect:
  • Tortilla shells in place of noodles.
  • Salsa instead of tomato sauce.
  • Beans n' veggies substitute for meat.
  • Cheddar replaces Mozzarella.
My mom sent me home with a hefty Tupperware-full after Sunday's family lunch, and we'll be enjoying it for at least two dinners this week.

So, although Adam and I clearly aren't starving (um, chocolate- peanut butter cupcakes anyone?), I'm more than happy to let our parents keep pretending we are.

Mexican Lasagna
(From the Hungry Spoon Mama...who credits this recipe with Diane T. of our local newspaper)

For all my vegan buddies out there, you can easily vegan-ize this hearty casserole by substituting the cheese with Garlicky White Bean Dip. Another tasty alteration would be to replace the burrito-size tortilla shells with crumbled tortilla chips.

Ingredients:
  • 2 tsp. canola oil
  • 2 large onions, diced
  • 2 bell peppers, diced
  • 3 cloves garlic, minced
  • 1 tsp. dried oregano
  • 1 tsp. cumin
  • 1 can (14.5 oz) diced tomatoes
  • 1 can (15 oz.) black beans, rinsed and drained
  • 1 can (15 oz.) kidney beans, rinsed and drained
  • 1 can (15 oz.) refried beans
  • 6 burrito-size tortilla shells
  • about 2 cups shredded sharp Cheddar cheese
  • fresh cilantro and salsa
Directions:
1) Heat a large skillet over medium high heat; add oil and saute onions, bell peppers, garlic, oregano, and cumin for about 3 minutes. Add tomatoes and simmer for 10 minutes. Set aside.

2) Divide the tomato mixture evenly between 3 bowls. Add a can of beans to each bowl and mix well. In the bottom of a 13 x 9 inch pan, spread one of of the bean mixtures. Top with 2 tortillas and 1/3 of the cheese. Add another bowl of bean mixture on top, 2 tortilla shells, and another 1/3 of the cheese. Complete layers with remaining beans, tortillas and cheese.

3) Cover with foil and bake at 375 for 30 - 35 minutes, or until heated through and cheese is melted.

Sunday, January 23, 2011

French Toast Elvis Sandwich


Girlfriends are kind of the best, aren't they?

They call to talk just when you need it. They're always ready to share a dessert. They travel hundreds of miles in a day, just to hang out for 24 hours.

And sometimes, on those especially rockin' days, they send you a package filled with goodies.

My buddy Katie is 4 feet and 11 inches of Cleveland-born awesome-ness. Today I found an early birthday package from her on my doorstep, filled with treats she knew I would appreciate (read: cookbooks and food). Amongst the goodies, I discovered this:
Alas! My heaven-on-earth Saturday night dinner was born.

Picture it: 2 slices of homemade bread, slathered with White Chocolate Peanut Butter, sliced bananas, and a drizzle of honey. Bread is sandwiched together, dipped in a wonderful cinnamon-egg batter, and turned into a French Toast sammie that will bring you to your knees.

I rest my case. White Chocolate Peanut Butter is reason #237 why girlfriends are kind of the best :)

Peanut Butter-Banana French Toast Sandwich
(I'd like to say it's a Hungry Spoon original, but I think Elvis may have beat me to it)

This sandwich clearly shows why peanut butter banana sandwiches and French Toast are a match made in heaven.

Ingredients:
  • 2 slices of homemade bread
  • Plenty o' peanut butter (I used White Chocolate Wonderful Peanut Butter)
  • 1 banana, sliced
  • a drizzle of honey
  • 1 large egg, lightly beaten
  • a little milk
  • a pinch of cinnamon
  • a dash of vanilla
  • a little butter (or Smart Balance) for the skillet
Directions:
1) Prepare a Peanut Butter-Banana-Honey Sandwich to your liking (My method: Spread peanut butter on each slice of bread. Place banana slices on one slice of bread. Drizzle lightly with honey and place the other piece of peanut butter bread on top. Sandwich complete!).

2) In a shallow dish (I used a small pie pan), whisk together one large egg, a little milk, cinnamon, and vanilla extract. Place the sandwich in the egg mixture and allow it to sit for about 30 seconds or so. Flip the sandwich and allow the other side to absorb the egg mixture.

3) Heat a little butter or Smart Balance in a skillet over low-medium heat. Place the sandwich on the skillet (you can pour any leftover egg mixture over top if you'd like) and allow the sandwich to cook until nicely browned on the bottom--about 4 minutes or so. Flip the sandwich and cook until the other side is also nicely browned. Serve with extra banana slices.


Saturday, January 22, 2011

Cookies on the Brain


For some households, cookie season ends right around the New Year...about the same time the Christmas decorations are packed away, and everyone is vowing to a year of healthy decisions.

Fortunately, the Hungry Spoon cookie season lasts 365 days a year. We never tire of new cookie recipes. Plus, it's critical to practice your cookie-making skills throughout the year so you're fully prepared for the next holiday season.

I guess this makes cookie-baking a pretty self-less act then. (I've become fairly good at rationalizing my baking compulsions, haven't I?)

At any rate, this week Adam was hungry for Chocolate Crinkle Cookies, and I was eager to deliver. I created a new recipe based on one in my favorite cookie cookbook: Vegan Cookies Invade Your Cookie Jar.

My use of non-vegan vanilla yogurt and non-vegan chocolate chips stripped them of their virgin vegan status, but I'm not complaining. The yogurt contributed to a ridiculously moist crumb, and the double-shot of chocolate (from both cocoa powder and melted chocolate chips) made these cookies blue ribbon winners in our house.

Cheers to a cookie-baking season that lasts 365 days a year!

Chocolate Crinkle Cookies
(adapted from a recipe in Vegan Cookies Invade Your Cookie Jar)

These bite-size cookies are the perfect treat to pair with a cup of coffee, sneak into your favorite person's lunch bag, or just to munch on while you're cooking dinner :)

Ingredients:
  • 1/2 cup sugar
  • 1/4 cup oil
  • 3 TBSP non-fat vanilla yogurt
  • 1 tsp. vanilla extract
  • 1/3 cup milk (I used skim)
  • 1 TBSP ground flaxseed
  • 1/2 cup dark chocolate chips, melted (I simply melted mine on a double boiler)
  • 1 - 1/4 cups all-purpose flour
  • 2 TBSP cocoa powder
  • 3/4 tsp. baking powder
  • 1/4 tsp. salt
For the coating:
  • 1/3 cup granulated sugar
  • 3/4 to 1 cup powdered sugar, sifted
Directions:
1) Preheat oven to 325 degrees and coat baking sheets with cooking spray.

2) In a large bowl, mix the sugar, oil, yogurt, vanilla, milk, flaxseeds, and melted chocolate until smooth. Stir in the flour, cocoa powder, baking powder, and salt. You will have a thick, moist dough. Refrigerate for about 45 minutes.

3) Meanwhile, place the sifted powdered sugar on a large plate, and pour the granulated sugar in a small bowl. To prepare the cookies, take a large, rounded tablespoon of dough, roll it in a ball, roll it in the granulated sugar, and then roll it in the powdered sugar. Place on the baking sheet and repeat until the dough is gone.

4) Bake cookies for about 11 - 12 minutes, or until they're puffed and cracked. Allow to cool and gobble them up--I swear they taste like brownie cookies :)

Thursday, January 20, 2011

Takin' it Back to 2002

Picture it: Fall 2002, my freshman year of college.

I wore cut-off denim capri pants my first day of freshman orientation. My Big Fat Greek Wedding was my favorite movie. AOL Instant Messenger (AIM) was all the rage (remember "Away Messages"? Yikes.). Gas cost $1.65 a gallon.

Everything was new to me: new state, new people, and the overall new-ness of the "college experience." I had never heard of buckeyes or Skyline Chili (to this day I've never eaten Skyline Chili. I prefer my pasta sans meat...and sans cocoa powder).

And finally, I remember eating at a Chi-Chi's Restaurant for the first time. While my taste in food has changed significantly since then, at the time I thought I'd died and gone to heaven. Fresh chips and salsa while you wait? Quesadillas the size of my torso? Men in sombreros singing "Happy Birthday?" Wide-eyed and somewhat sheltered, this was 18-year old Kylie's dream come true.

My favorite part of Chi-Chi's was the sweet little corn cake that came with every meal. I'm embarrassed to admit that it made such an impression on me. I loved those darn things. And despite the fact that I haven't eaten at a Chi-Chi's in 8 years, I got a craving for those darling corn cakes this week.

Thank you, Veganomicon. This brilliant cookbook provided a vegan version that's slightly more savory than sweet, but satisfied my craving.

Rock on, 2002. The soundtrack to this recipe is definitely a toss-up between Michelle Branch's "Everywhere" and Missy Elliot's "Work It." It's so 9 years ago.

What were you doing in 2002?

Vegan Corn Casserole
(adapted from Veganomicon cookbook)

Ingredients:
  • a dash of olive oil
  • 3 cups frozen corn
  • 1 red bell pepper, finely diced
  • 1 yellow pepper, finely diced
  • 1 large onion, finely diced
  • 1 cup light coconut milk
  • 1/4 cup cornstarch
  • 1/2 cup cornmeal
  • 2 TBSP brown sugar
  • 1/3 cup chopped fresh cilantro
  • 1 tsp. salt
Directions:
1) Preheat oven to 350 degrees and lightly coat an 8 x 8 inch pan with cooking spray.

2) Heat a dash of olive oil in a large skillet over medium heat. Add the corn, bell peppers, and onion to the skillet and saute for about 10 minutes, until lightly browned.

3) Meanwhile, combine the coconut milk and cornstarch in a bowl; stir until cornstarch is dissolved.

4) When the corn mixture is ready, transfer 2 cups of it to a food processor. Process the corn mixture and coconut milk mixture. In a large bowl, combine the processed mixture, the remaining corn and bell pepper mixture, the cornmeal, brown sugar, cilantro, and salt. Stir until thoroughly combined. Pour into prepared baking pan and bake for 40 minutes. Allow to cool for 10 minutes before serving.


Wednesday, January 19, 2011

Quesadilla Surprise

I've found that many recipes can be vegan-ized and taste just as good (if not far better) than their dairy-filled counterparts.


And meatballs have a lovely vegan twin called Bean Balls.

I've even been known to vegan-ize Southern favorites like seasoned collard greens.

However, when it came to quesadillas, I felt certain I would never taste a vegan version I liked as well as its cheesy twin. Let's face it: quesadillas were designed for cheese-lovers. That gooey cheddar, sandwiched between two halves of a tortilla shell, is the hallmark of the dish.

Then Sunday, January 16, 2011 came into my life. The day brought a garlicky, cheese-less, roasted corn quesadilla, and it laughed in my fearful face.

I know, I know: A bit melodramatic. Truthfully, Adam was feeling creative in the kitchen and he wanted to surprise me with Sunday dinner...using only ingredients we had on hand (and needed to use up). The result was Garlicky White Bean and Roasted Corn Quesadillas.

Thus, this week I've become a believer in not just cupcakes, but also in cheese-less Mexican food.

Don't get any ideas though. I don't intend to pass up the queso next time we head to Black Bear for dinner.

Garlicky White Bean and Roasted Corn Quesadillas
(an Adam original)

The deliciously flavorful white bean dip serves as a binding agent and cheese stand-in for this vegan take on a Mexican favorite. You may never go back to the dairy-filled version again.

Ingredients:
  • a dash of olive oil
  • 1 cup frozen corn kernels
  • 1 large onion, diced
  • Roma tomatoes, diced
  • 1 recipe for Garlic & Pine Nut Bean Dip (except we didn't have fresh parsley or pine nuts, so we just left 'em out!)
  • Tortilla shells
  • Fresh spinach, salsa, and diced avocado for topping
Directions:

1) Heat a dash of olive oil in a skillet over medium heat. Add corn and cook until lightly browned, about 5 - 10 minutes. Add onion and cook until softened.

2) To prepare quesadillas, generously spread tortilla shell with bean dip. Top one half of the shell with the roasted corn mixture and diced tomatoes. Fold in half. Heat a little olive oil in the same skillet, and cook quesadilla on one side until golden brown (about 3-4 minutes). Flip and cook until other side is lightly browned. Serve with chopped spinach, avocado, and salsa.


Tuesday, January 18, 2011

Pumpkin in January

When I think of pumpkin, I think of any of the following: Fall, October, muffins, bread, pie, and Thanksgiving.

When someone says "pumpkin," I would not typically think of pasta. Or the month of January. It just seems inappropriate.

Until now.

Tonight's dish defies everything you thought you knew about pumpkin. We're talking pumpkin meets whole wheat pasta, caramelized onions, toasted walnuts, Asiago cheese...and a savory crumb topping.

It's kind of like macaroni and cheese with a mega-hit of beta carotene and vitamin A, right? This baby is good, it's filling, and it was clearly designed to be eaten on a cold January day.

The recipe is actually a creative hybrid: I combined my friend Lisa's recipe for Pumpkin-Cheese Ravioli with Veganomicon's Pumpkin and Caramelized Onion Manicotti. If you're a major cheese fanatic, feel free to pump up the cheese factor as you see fit. And the crumb topping? Simply blissful, friends. Simply blissful.

Pumpkin-Asiago Penne with Walnut Crumb Topping
(a hybrid recipe, adapted from the minds of Lisa S. and Veganomicon)

I simply couldn't go vegan with this one--I love Asiago too much, and I think the salty sharp-ness of the cheese added a scrumptious flavor. However, you can vegan-ize the recipe by using a homemade, dairy-less ricotta (a quick online search will point you in the right direction) and eliminating the cheese.

Pasta Ingredients:
  • 3/4 pound whole wheat pasta
  • 2 large onions, thinly sliced
  • 2 TBSP olive oil
  • 2 cups part-skim ricotta cheese
  • 1 (15 oz) can of pumpkin puree
  • 1 TBSP brown sugar
  • 1/4 tsp. nutmeg
  • 3/4 tsp. salt
  • 1 cup shredded Asiago cheese
  • 1/4 cup veggie broth
  • Freshly ground black pepper
Crumb Topping Ingredients:
  • 2 - 1/2 cups fresh bread crumbs
  • 1/2 cup finely chopped walnuts
  • 1/4 cup Earth Balance (or real butter)
  • 2 tsp. Savory seasoning or poultry seasoning
  • 1 tsp. dried Oregano
  • 1/2 tsp. dried Paprika
  • Salt n' Pepper
Directions:
1) Preheat oven to 375 degrees and prepare pasta according to package directions. Drain and set aside.

2) While the pasta is cooking, cook the onions. Heat the olive oil in a large skillet over medium heat. Saute the onions until nicely browned--about 10 - 15 minutes.

3) In a large bowl combine the ricotta, pumpkin puree, brown sugar, nutmeg, salt, Asiago, veggie broth, and pepper. Stir in the caramelized onions and pasta. Pour into 9 x 13 inch baking pan.

4) To prepare the crumb topping, melt the Earth Balance/butter in a skillet over medium heat. Add the remaining ingredients and cook/toast for 3 - 5 minutes, until the mixture is thoroughly combined and well-coated. Sprinkle evenly over the penne pasta.

5) Bake for 30 minutes, or until top is lightly browned. Cool for 10 minutes before serving.

Monday, January 17, 2011

Cupcake Believer


In my previous life, I wasn't much of a cupcake person. I preferred a big ol' honkin' slice of cake.

I feared the cupcake because it seemed to dictate its serving size to me: One cupcake is one serving. With a full cake though, a serving is a slice...and your slice can be as big as you want it to be. That's my kind of serving size.

However, I've become a cupcake believer over time. They're cute, they're snack-size, and they're rich with decorating possibilities. Plus, as I near the ripe old age of 27, it's probably not such a bad idea that my food start to dictate its serving size to me.

Given my recent affinity for the cup o' cake dessert, I was thrilled to receive Vegan Cupcakes Take Over the World as an early birthday present from my in-laws this weekend (They also gifted me with the unbeatable Veganomicon. Adam's parents clearly have impeccable cookbook taste).

This cookbook rocked my fuzzy socks right off my feet. We're talking over 100 pages of toasted coconut cupcakes, lemon-blueberry cupcakes, banana split cupcakes...and lots of dark chocolate ganache.

I may never go back to full-size cakes again.

Do you need a little push to become a cupcake believer? Try today's recipe: Chocolate Yogurt Cupcakes with Peanut Butter frosting. I adapted their recipe quite a bit to work with ingredients I had on hand, which resulted in a non-vegan cupcake with ever-so-slightly less fat than the original recipe (secret ingredient: vanilla yogurt).

The non-optional key to this recipe? The peanut butter frosting. Oh heavens, yes.

If these choco-peanut butter love bugs don't make you a cupcake believer, I don't know what will.

Chocolate Yogurt Cupcakes with Peanut Butter Frosting
(adapted from a recipe in Vegan Cupcakes Take Over the World by Isa Chandra Maskowitz and Terry Hope Romero)

I subbed in non-fat vanilla yogurt for a significant amount of the oil in this recipe. You won't even notice...especially with those mounds of peanut butter frosting on top. And please note, this recipe is NOT vegan! This recipe makes 14 - 15 cupcakes

Cupcake Ingredients:
  • 2/3 cup semi-sweet chocolate chips
  • 1/2 cup vanilla yogurt (I used nonfat)
  • 1/2 cup milk (I used skim)
  • 3/4 cup sugar
  • 1/3 cup canola oil
  • 1 tsp. vanilla extract
  • 1/2 tsp. almond extract
  • 1 TBSP instant coffee granules
  • 1 cup + 2 TBSP all-purpose flour
  • 1/4 cup cocoa powder
  • 1/2 tsp. baking soda
  • 1/4 tsp. salt
Peanut Butter Frosting Ingredients:
  • 10 TBSP butter, at room temperature
  • 2/3 cup no-stir, natural creamy peanut butter
  • 2 tsp. vanilla extract
  • 2 - 1/2 cups confectioner's sugar
  • 2 - 4 TBSP milk
  • Chopped peanut butter cups
Directions:
1) Preheat oven to 350 degrees and line a 12 cup muffin tin with cupcake liners (after filling the 12 cupcake cups, I poured the extra batter into 2 ramekins for 2 additional gi-normous cupcakes).

2) Melt the chocolate chips in a double boiler and set aside. In a large mixing bowl, mix together the yogurt, milk, sugar, oil, vanilla extract, and almond extract. Sift in the remaining ingredients and beat well with an electric mixer (about 2- 3 minutes). Stir in the melted chocolate.

3) Pour batter into cupcake liners, filling only 2/3 full. Bake for 23 - 26 minutes, or until toothpick inserted in the center comes out clean. Allow to cool completely before frosting.

4) To prepare the frosting, beat the butter and peanut butter together; beat in the vanilla extract. Slowly sift in the confectioner's sugar while continuously beating and add 1 - 2 TBSP of milk (whatever is needed to get the frosting to spreading consistency).

5) When cupcakes have cooled, frost each one generously with the peanut butter frosting. Top with chopped Reese's peanut butter cups.